
Your Ultimate Guide to RC Car 1/10 Bodies
Welcome to the exciting world of RC car 1/10 bodies—the most popular and versatile class in the hobby. This guide is your complete roadmap to finding, fitting, and personalizing the perfect body for your vehicle, whether you're a competitive racer or a dedicated hobbyist.
Why 1/10 Scale RC Bodies Dominate the Hobby

If you've ever walked into a hobby shop or visited a racetrack, you’ve probably noticed one scale stands out above all others: 1/10. This isn't by accident. The 1/10 scale hits the sweet spot for performance, realism, and accessibility, making it the undisputed king of on-road RC racing.
Think of it like choosing a canvas for a masterpiece. A smaller scale can be too restrictive, while a larger one might be unwieldy and expensive. The 1/10 scale gives you the perfect balance. It’s large enough for intricate details and serious aerodynamic engineering, but not so big that it becomes a hassle to transport or requires a massive budget.
The Ideal Balance of Performance and Customization
The incredible popularity of the 1/10 scale has created a massive ecosystem to support it. That means you have an unbelievable selection of bodies, parts, and upgrades right at your fingertips. At Digital-RC, we focus on this dominant class because it offers the absolute best options for serious racers.
This guide is designed to walk you through every step of the process. We’ll cover everything you need to know to make the right choice and get a professional finish on your next project.
You will learn about:
- Body Styles: Discover the key differences between touring car bodies and how their shapes directly influence on-track handling.
- Materials and Weight: Understand how polycarbonate thickness affects durability and performance, helping you choose between a standard or lightweight shell.
- Fitting and Mounting: Learn the essential techniques for trimming, reaming, and mounting your body for a perfect fit on your chassis.
- Painting and Finishing: Master the art of painting from the inside, applying decals, and creating a custom look that stands out on the track.
Choosing the right 1/10 scale body is about more than just looks—it’s a critical performance decision. The body is the primary aerodynamic component of your car, directly influencing downforce, stability, and cornering speed.
Ultimately, your RC car 1/10 bodies are a reflection of your style and a key part of your performance setup. Once you understand the fundamentals, you can confidently pick and prepare a body that not only looks incredible but also helps you shave seconds off your lap times. Our curated collection at Digital-RC provides high-quality options for every racer, ensuring your car performs at its peak.
Choosing Your Body Style for Touring Cars

Just like with a real race car, the shape of your RC body is a critical performance part, not just a pretty shell. It has a massive impact on how your car handles at speed, influencing everything from cornering grip to straight-line stability.
When it comes to on-road racing, touring car bodies dominate the track. Think of them as highly-tuned machines, sculpted for a very specific environment. Picking the right one is the first step in defining your car’s on-track personality.
The Art of Downforce with Touring Car Bodies
Touring car bodies are the workhorses of high-grip carpet and asphalt racing. Their designs often mirror real-world sedans you'd see in series like the World Touring Car Cup, but they're sculpted with aggressive aerodynamic features for one primary reason: to generate maximum downforce.
Downforce is that invisible hand pressing your car onto the track, giving your tires the bite they need to carve through tight, technical corners without losing traction.
You'll spot these key features right away:
- Aggressive Front Splitters: These guide air under the car to create a low-pressure zone, literally sucking the front end to the track for razor-sharp steering.
- Pronounced Side Dams and Skirts: These elements clean up the airflow along the sides of the car, preventing turbulence from unsettling the chassis.
- Large Rear Wings: The most obvious feature, a well-designed wing generates huge rear downforce, keeping the back end planted during hard acceleration and high-speed turns.
A touring car body acts like an upside-down airplane wing. Instead of generating lift to fly, it creates 'negative lift'—or downforce—to stick to the ground. This is what makes those mind-bending cornering speeds possible.
At Digital-RC, we stock bodies engineered for this exact purpose. The goal is always to find that perfect balance between aggressive cornering downforce and low drag for speed on the straights. It’s a delicate compromise that top manufacturers are constantly refining. For those pushing the limits, exploring options like the feather-light Xtreme Twister 1/10th Scale Touring Car Body can provide a huge advantage by lowering the car's centre of gravity.
The Pursuit of Efficiency with LMH-Style Bodies
While most of our selection focuses on touring cars, we also cater to racers looking for sleek, low-profile shells that look like Le Mans Hypercar (LMH) racers. These are designed for one thing: slicing through the air with the least possible resistance.
You'll typically find these on 1/10 scale chassis built for blistering speed on large, flowing tracks. Here, minimizing aerodynamic drag is the absolute top priority. Every curve and contour on an LMH body is optimized to let air flow over it as smoothly as possible. That efficiency means higher top speeds, plain and simple.
Features that define these bodies include:
- Low, Smooth Profiles: The body sits incredibly low, with a cockpit-forward design that shrinks the car's frontal area.
- Enclosed Wheel Wells: Many of these bodies cover the wheels to stop the turbulent air they create from causing drag.
- Integrated Fins and Stabilizers: These features maintain stability at insane speeds without needing the big, draggy wings found on traditional touring cars.
The result is a body that's incredibly efficient, allowing the motor to work less to hit and maintain top speed. A great example is the ZooRacing Hyrax LMH 1/10 Body at 0.7mm, which offers a massive competitive advantage on the straights for classes that permit it.
How Body Materials Impact Performance and Durability
Your 1/10 scale RC car body is more than just a shell; it's a critical tuning component that directly impacts how your car handles and how well it survives a rough day at the track. The choice you make here boils down to a classic trade-off: battlefield resilience versus lightweight, agile performance. The entire industry revolves around one incredible material: polycarbonate, often known by the brand name Lexan.
Polycarbonate is the undisputed champion for RC bodies, and for good reason. It’s incredibly tough, highly flexible, and crystal clear, making it the perfect canvas for your custom paint job applied safely on the inside. But not all polycarbonate is created equal. The key difference is its thickness, a single variable that can completely change your car's on-track behaviour.
This choice creates two main categories you'll find at Digital-RC: standard and lightweight.
Standard Thickness for Maximum Durability
Think of a standard thickness body, typically around 0.7mm to 0.8mm, as a trusty suit of armour. This is your go-to option for practice days, club racing, or for anyone just getting started. That extra material provides a significant boost in durability, helping the body shrug off accidental bumps, high-speed tumbles, and the general abuse of a race weekend.
This added toughness is priceless when you're learning a new track or just pushing your limits. A crash that might crack a thinner shell will often just leave a scuff on a standard body, saving you time, money, and frustration. It gives you the confidence to drive hard without constantly worrying about destroying your hard work.
Lightweight Bodies for a Competitive Edge
A lightweight body, on the other hand, is like a pro athlete's specialized gear. These are usually around 0.5mm thick. Shaving off those few tenths of a millimetre might not sound like a lot, but in the world of competitive racing, it's a game-changer. That weight reduction, even if it's only a few dozen grams, has a profound impact.
This weight is removed from the highest point of the car, which significantly lowers its centre of gravity.
A lower centre of gravity is the holy grail of RC setup. It reduces body roll in corners, allowing the car to change direction more quickly and maintain higher speeds through technical sections of the track.
The difference is something you can feel immediately. Your car will be more nimble, responsive, and feel "plugged in" to the track surface. For any serious racer, this handling advantage is non-negotiable. Exploring options like the feather-light Xtreme Twister 1/10th Scale Touring Car Body is a proven way to find that extra edge in tight racing classes.
To make the choice clearer, here’s a quick breakdown of how these two options stack up.
Standard vs Lightweight RC Body Comparison
This table offers a direct comparison of standard and lightweight polycarbonate bodies, helping you pick the right option for your specific needs, whether you're a hardcore racer or a weekend basher.
| Attribute | Standard Body (e.g., 0.7mm) | Lightweight Body (e.g., 0.5mm) | Best For |
|---|---|---|---|
| Durability | High. Resists cracks and tears from impacts. | Lower. More prone to cracking, especially in cold weather. | Standard: Practice, club racing, new drivers. Lightweight: Qualifying, main events. |
| Performance | Good. Stable and predictable handling. | Excellent. Lowers centre of gravity for faster cornering. | Standard: All-around use. Lightweight: Competitive racing. |
| Weight | Heavier, which can increase stability in some conditions. | Significantly lighter, improving agility and acceleration. | Standard: High-grip tracks, beginners. Lightweight: High-level competition. |
| Cost | Generally more affordable and longer-lasting. | Often a premium price for a disposable race-day item. | Standard: Budget-conscious racers. Lightweight: Racers seeking every advantage. |
Ultimately, the choice comes down to your priorities. Many competitive racers keep both types in their pit bag—a standard body for practice and a fresh lightweight one for qualifying and the main events. This strategy gives them the best of both worlds: rugged dependability for practice and ultimate performance when it counts.
How to Nail the Perfect Fit on Your Chassis
A body that doesn't fit right doesn't just look sloppy—it can completely ruin your car's handling and aerodynamics. Getting that perfect, professional fit is what separates a simple assembly from a high-performance machine. It's a skill that's part precise measurement and part careful, hands-on work.
It all starts with one fundamental number: the wheelbase. This is the distance from the centre of your front axle to the centre of your rear axle. Think of it as your car's footprint. Before you even look at a new shell, you need to know this measurement cold.
Once you know your chassis's wheelbase, you can browse the RC car 1/10 bodies at Digital-RC with confidence. We list the intended wheelbase right on the product page, so you can perfectly match it to your car for a balanced look and, more importantly, optimal performance.
Mastering the Wheelbase Measurement
Measuring your wheelbase is simple, but you need to be accurate. A ruler or a set of digital calipers will give you the best results. Just measure from the centre of the front wheel nut straight back to the centre of the rear wheel nut. Most 1/10 touring cars run a standard wheelbase of around 257mm, but it always pays to measure your specific chassis just to be sure.
A mismatch here is a recipe for disappointment. If the body is too short, your wheels will poke out awkwardly past the wheel arches, creating drag and looking terrible. If it's too long, they’ll be tucked too far inside, which can kill your suspension travel and steering lock.
The Essential Tools for Body Prep
With a crystal-clear body from Digital-RC in hand, it’s time to gather a few essential tools. You don't need a huge workshop, just the right gear for a clean job.
- Curved Lexan Scissors: These are non-negotiable. Their curved blades are designed specifically to follow the complex lines of wheel arches, letting you make smooth, clean cuts without cracking the polycarbonate.
- Hobby Knife: For straight cuts and fine-tuning, a sharp hobby knife gives you the kind of precision you just can't get with scissors.
- Body Reamer: This is the secret to perfect holes for your body posts. Using a drill bit will almost always grab and crack the lexan. A reamer, on the other hand, shaves the material away, leaving a flawless, round hole every time.
Pro Tip: Before you make a single cut, trace your intended cut lines on the outside of the overspray film with a permanent marker. It gives you a perfect guide to follow and wipes right off if you need to make a correction.
The whole idea is to remove material slowly and methodically. Never rush it. This brings us to the most important rule of all.
Test-Fitting Is Not Optional
The golden rule of body prep is simple: test-fit, test-fit, and test-fit again. Never, ever assume your first cut or hole is perfect. After trimming the major excess plastic, set the clear body over your chassis. Check everything—the alignment, the ride height, and the wheel clearance from every single angle.
Is the body sitting level? Are the wheels perfectly centred in the arches? Is there enough clearance for the shock towers and electronics?
This is your only chance to make small adjustments before you commit. Once you ream the holes for the body posts, that's it—its position is locked in. Taking a few extra minutes here to double-check your work is what separates a professional result from a frustrating mistake. In fact, sales stats from California's top RC distributor showed that 1/10 RC car bodies made up 68% of all shell purchases, with hot-sellers supporting wheelbases of 260-280mm. It just goes to show how critical a good fit is for hobbyists. You can dive deeper into popular chassis specs from industry leaders like Horizon Hobby.
This infographic breaks down the choice between a tough body for practice and a lightweight one for race day.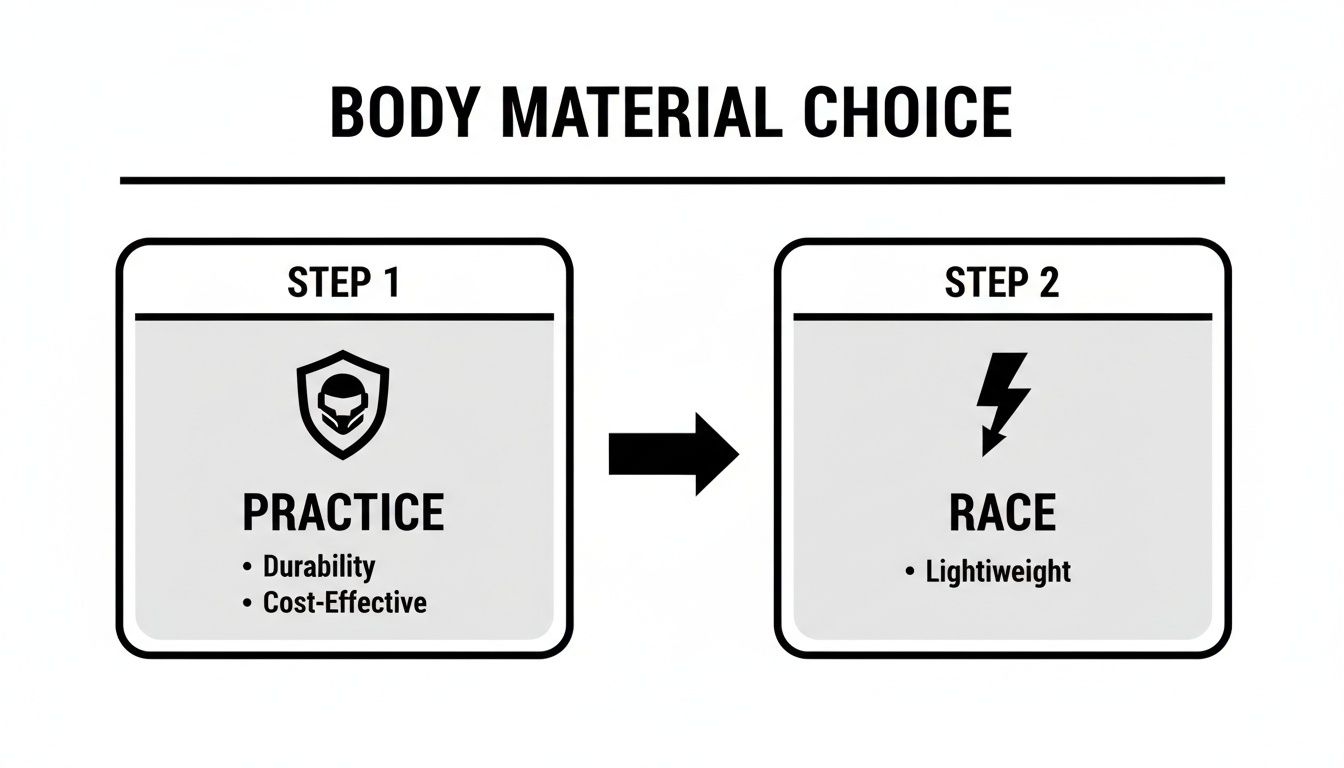
It lays out a clear decision-making process: go for a robust body when you're just turning laps and save the lighter options for when every gram counts in competition.
Painting Your Body for a Pro-Level Finish
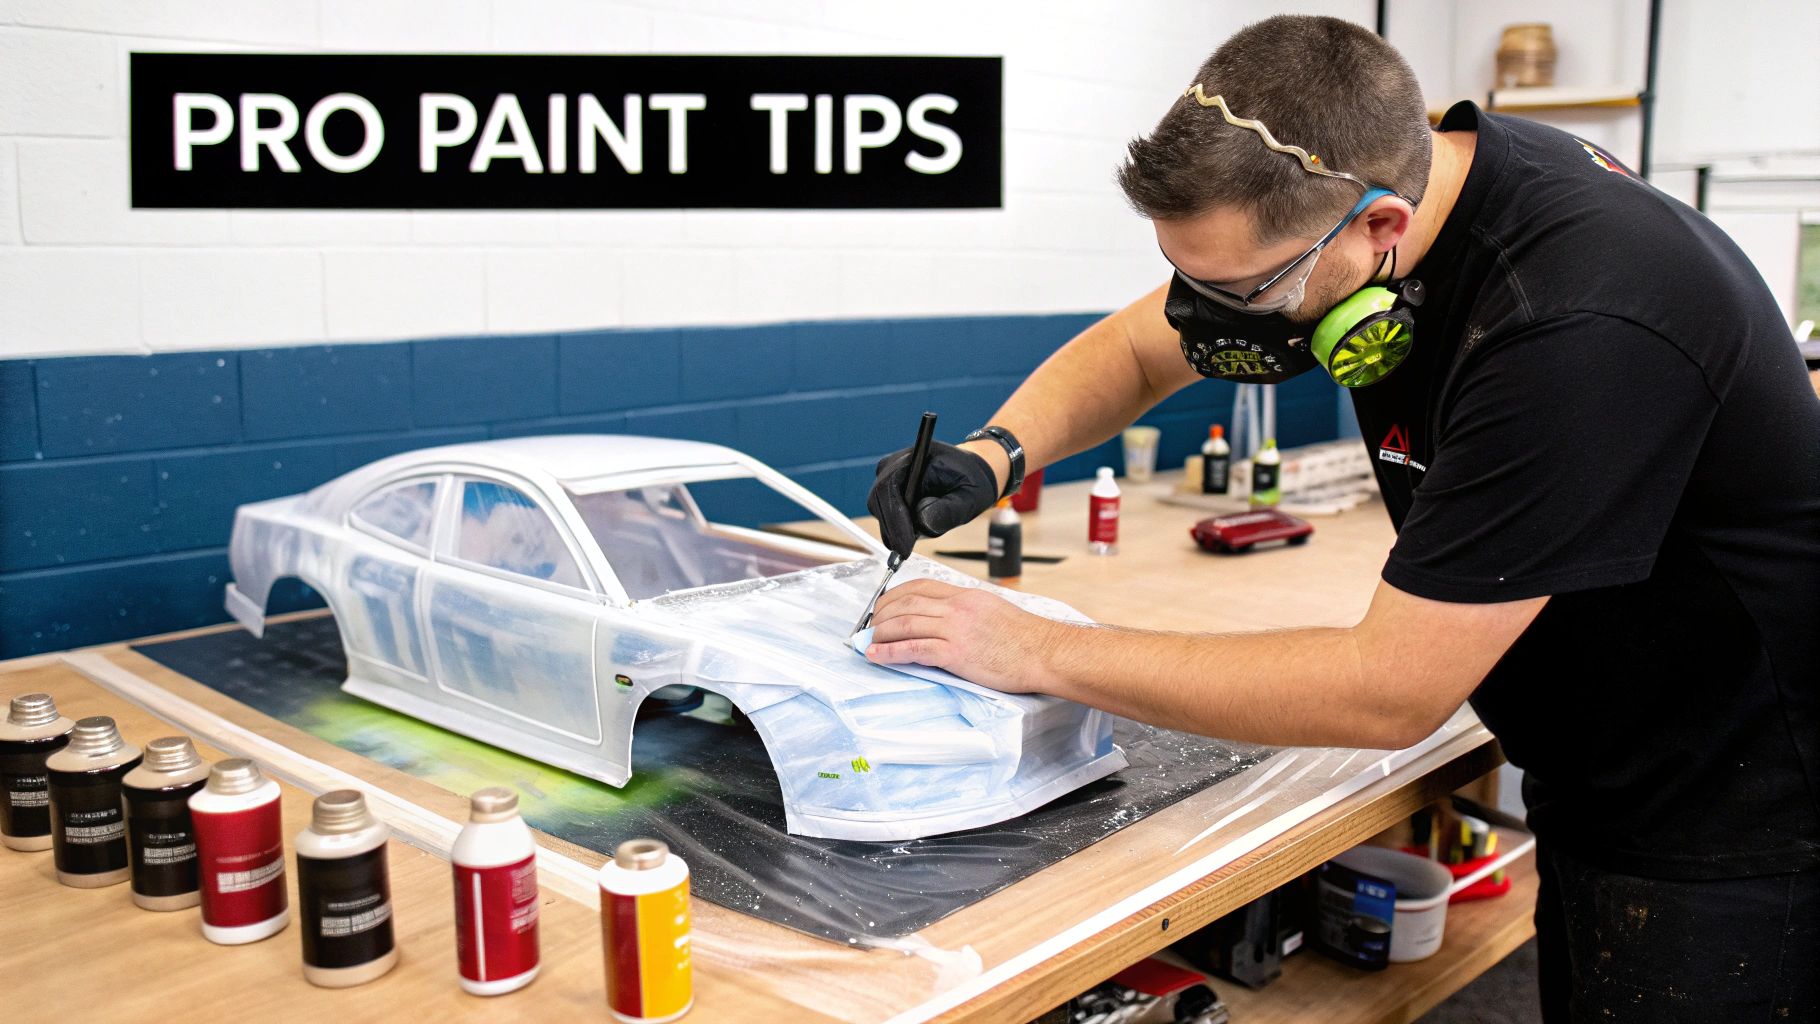
This is where the magic happens. After all the careful trimming and fitting, it's time to bring your RC car 1/10 bodies to life. Painting is your chance to get creative and turn a clear shell into something that's uniquely yours. It might seem like a job for a pro, but trust me, getting a track-worthy finish is all about patience and following the right steps.
The real secret to a killer paint job isn’t artistic talent—it's preparation. The entire process happens on the inside of the body, which is a huge advantage. It means your masterpiece is protected from scuffs and scrapes once you start racing. Everything, from cleaning to the final coat, is done in reverse.
The Foundation of a Flawless Finish
Before you even think about picking up a spray can, prep is everything. Every clear body from Digital-RC comes with a thin overspray film on the outside. Just leave it on for now; your entire focus is on the inside of the shell.
First things first, give the inside of the body a good wash with warm water and a touch of dish soap. This little step is critical for removing any mould-release agents left over from manufacturing. Those oily residues are the number one enemy of a good paint job and will cause ugly "fish-eye" spots if you don't get rid of them.
Once it's bone dry, you can start masking. This is how you'll block off the areas you don't want a certain colour to hit.
- Window Masks: Most quality bodies, like the sleek Team C Wolf Max 1/10 Touring Car Body, include pre-cut vinyl masks for the windows. Apply them carefully and press the edges down firmly to stop any paint from bleeding underneath.
- Custom Graphics: If you're planning stripes, logos, or a multi-colour scheme, you'll need high-quality painter's tape or liquid mask. When you're laying down tape, run your fingernail along the edges to create a perfect seal.
If there's one mistake I see new painters make, it's rushing the prep. Seriously, an extra 15 minutes spent cleaning and masking will save you hours of headaches later. A clean surface and sealed mask edges are 90% of the battle won.
Applying Colour Like a Professional
With your body masked up, it's time for the fun part. The golden rule is to use paints made specifically for polycarbonate (often called Lexan). These paints are flexible and actually bond with the plastic, so you won't get the cracking and flaking you would from regular hardware store paint.
The technique is all about control: apply multiple thin, light coats instead of one heavy one. A thick coat takes forever to dry and is far more likely to run or bleed under your tape. Hold the can about 20-30 centimetres away and use smooth, sweeping passes.
Here's a pro tip that makes a huge difference: spray your darkest colours first. If you're doing a design with black and yellow, you’d mask off the yellow sections, spray the black, let it dry, then remove the mask and spray the yellow. If you did it the other way around, the black would show right through the yellow, muddying the whole look.
Backing and Finishing Touches
After your main colours are dry, it's time for the final "backing" coat. This is usually a solid coat of white or silver sprayed over the entire inside of the body, and it's a step you should never skip.
Backing your colours does two important things:
- It protects your paint job from getting scratched up from the inside by your chassis components.
- It makes your colours look way more vibrant and solid from the outside. A metallic colour backed with black will look deeper and richer, while a bright fluorescent backed with white will absolutely pop.
This last layer gives your shell that professional, finished look. The demand for these techniques has even spilled over into the collector's market. In California, for instance, the vintage scene for 1/10 bodies from the 1980s has exploded, with custom painters in Orange County reporting a 30% jump in requests for aged patina effects on retro shells.
Once your backing coat is completely dry, you can finally peel off that outer overspray film. Go ahead, admire your work—you've earned it.
Finding Your Next RC Body at Digital-RC
You've got the theory down—body styles, materials, and prep. Now comes the fun part: picking your next shell. At Digital-RC, we’ve laid out our collection of RC car 1/10 bodies to make that choice as easy and effective as possible. This isn't just a random list of products; it's a hand-picked selection built for competitive racers.
You can confidently take what you've learned and apply it directly to our categories, each one dialled in for a specific on-road racing discipline. We've cut through the noise so you can focus on the details that actually matter on the track.
Navigating Our Curated Collections
Finding the perfect match for your chassis and driving style is straightforward. We make sure our product pages give you all the critical specs you need—clearly listing wheelbase compatibility, material thickness, and exactly what’s in the bag, like decals or window masks. No guesswork.
Here’s how our main categories help different racers:
- High-Downforce Bodies for Competition: This is your stop for aggressive, aero-focused touring car shells engineered for maximum cornering grip. If you’re racing on tight, technical tracks, these are the bodies that will give you that locked-in feeling.
- LMH and Low-Drag Styles: Looking for pure speed? Here you’ll find the sleek, low-drag options built for aerodynamic efficiency. They're perfect for wide-open, high-speed ovals or fast, flowing road courses where straight-line speed is king.
- Durable Shells for Beginners: If you're just getting started or need a solid practice body, this collection is for you. These standard-thickness shells are built to take a few hits while you're learning the ropes, offering great durability without killing performance.
Think of the body as the final piece of your setup puzzle. Use the specs on our product pages—like a 0.5mm lightweight material or a 257-260mm wheelbase—to confirm the fit and make sure it lines up with your performance goals.
With our clear categories and detailed descriptions, you can go from learning to buying with confidence. It's about choosing a body that not only bolts onto your chassis perfectly but also complements your driving style and gives you the competitive edge you’re after.
Your Top Questions About 1/10 RC Bodies, Answered
Jumping into the world of RC car 1/10 bodies can bring up a few questions, especially when you're chasing that perfect finish. We get it. Here are straight answers to the most common things we hear, so you can tackle your next project with confidence using parts from Digital-RC.
Will Any 1/10 Scale Body Fit My Chassis?
Not quite. While the "1/10 scale" label gets you in the ballpark, the single most important measurement for a clean fit is the wheelbase—that's the distance between the centre of your front and rear axles.
Always measure your chassis first, then check it against the specs on the Digital-RC product page. This is the only way to guarantee the wheel arches sit perfectly over your tires, avoiding that awkward, mismatched look. Width is also a factor (190mm for most touring cars), so confirming both is your ticket to a pro-level fit and finish.
Why Do I Have to Paint the Body from the Inside?
This is the golden rule of RC body painting for a reason. By painting the inside, the clear polycarbonate shell itself becomes your car's armour and high-gloss clear coat, all in one.
This simple trick shields your paint job from every scrape, roll, and bump it'll take on the track. Your design stays sharp and vibrant race after race. It's the secret to keeping your car looking its best, no matter how hard you drive it.
Painting from the inside is non-negotiable for durability. Polycarbonate is designed to flex on impact; if you painted the outside, the paint would just crack and flake off on the first hit. Applying it internally lets the paint flex with the body, keeping your work safe.
What Are the Must-Have Tools for Mounting a Body?
You don't need a pro workshop, but a few key tools make the difference between a hack job and a clean, professional install.
- Curved Lexan Scissors: These are purpose-built to glide through wheel arches and complex curves without cracking the polycarbonate.
- A Hobby Knife: Your go-to for scoring straight lines and trimming away small details with total precision.
- A Body Reamer: Forget using a drill bit. A reamer is the only way to create perfectly clean, round holes for your body posts without risking a split.
Can I Just Use Regular Spray Paint?
Absolutely not. You have to use paints made specifically for polycarbonate, often sold as "Lexan paint." Standard hardware store paint just won't work.
Regular paints don't have the right chemical agents to bond with the plastic, and they have zero flexibility. The moment your body flexes from an impact—or even just from handling—that paint will chip, peel, and flake right off, completely ruining all your hard work.
Ready to put this knowledge to work and find the perfect shell for your chassis? Check out our hand-picked collection of high-performance RC car 1/10 bodies at Digital-RC. We offer fast, same-day delivery across Canada to get you back on the track sooner. Find your next competitive edge right here: https://digitalrc.ca.