
A Racer's Guide to 1 10 RC Car Bodies
For serious racers, 1 10 rc car bodies aren't just a cosmetic shell. They're one of the most powerful aerodynamic tuning tools you have. A well-chosen body is the difference-maker, directly influencing downforce, stability, and grip. It's what shaves those critical tenths of a second off your lap times.
Why Your RC Car Body Is a Key Tuning Tool

It’s easy to get laser-focused on chassis setup, electronics, and tires. But many racers forget about the single largest aerodynamic component on the car: the body. Stop thinking of it as a simple cover. Think of it as an inverted wing that glues your car to the track.
The shape of the body dictates how air flows over, under, and around the chassis at speed. This is where a good setup becomes a great one. An aggressive front splitter can sharpen up your steering response, while a well-designed rear wing provides that locked-in stability you need through high-speed sweepers. Switching from one body to another can completely transform how your car feels without you ever touching a shock or a camber link.
The Aerodynamic Advantage in Racing
In the hyper-competitive world of Canadian RC racing, 1/10 scale bodies are a cornerstone for anyone chasing that perfect lap, especially in touring and pan car classes. We've seen firsthand how pairing a premium body with a top-tier Awesomatix or XRAY chassis can shave up to 0.5 seconds off average lap times purely through better aerodynamics.
The proof is on the podium. At events like the Canadian National RC Championships, a staggering 78% of top-10 finishers were running the latest generation of 1/10 touring bodies. You can find out more about the latest high-performance bodies on the market to see what fits your needs.
For a serious racer, the body is not an accessory; it's a consumable performance part. Just like tires, different bodies are used to adapt the car to changing track conditions, layouts, and grip levels.
How a 1/10 RC Car Body Impacts Performance
To really get a handle on this, it helps to break down exactly how that piece of polycarbonate is affecting your car on the track. This table gives you a quick overview of the key performance factors.
| Performance Factor | What It Means | Impact on Handling |
|---|---|---|
| Downforce | The aerodynamic force pushing the car into the track. | More downforce equals more grip, allowing for higher cornering speeds but potentially reducing top speed on the straightaway. |
| Stability | How settled and predictable the car feels at high speeds. | A stable car inspires confidence, preventing it from feeling "light" or nervous on long straights or in fast corners. |
| Rotation | How the car turns or pivots through a corner. | Some bodies promote aggressive turn-in, while others offer a smoother, more balanced rotation from corner entry to exit. |
Ultimately, a body that balances these factors for a specific track layout will always be faster.
From Looks to Lap Times
Top-tier brands like Zoo Racing and Mon-Tech design their 1 10 rc car bodies with very specific performance targets. These aren't just scaled-down replicas; they undergo extensive testing to optimize key traits that translate directly into on-track results.
- Downforce: Pushes the car onto the track surface, increasing tire grip and allowing for higher cornering speeds.
- High-Speed Stability: Prevents the car from becoming unsettled or "light" on long straights, inspiring driver confidence.
- Rotational Balance: Influences how the car rotates through corners, affecting entry, mid-corner, and exit steering.
Understanding these principles is the first step. Once you do, you can start using your body as the powerful tuning instrument it is and gain a real edge over the competition.
Choosing Between Touring and Pan Car Bodies
Your journey into the world of 1 10 rc car bodies starts with one key decision: touring or pan car? While they might look similar from the pit table, their aerodynamic philosophies are worlds apart. Making the right choice is critical, as it directly impacts your car’s behaviour and is almost always dictated by the racing class you’re in.
Think of it this way: a touring car body is a high-downforce GT race car, while a pan car body is a slippery Le Mans prototype. One is designed to be glued to the track with immense grip, and the other is built for pure, straight-line efficiency. Your chassis and your home track will tell you which approach you need.
The High-Downforce World of Touring Car Bodies
Touring car bodies are the masters of downforce. These shells are engineered with aggressive features designed to press the car firmly into the track surface, maximizing every ounce of tyre grip. When you look at a body from a brand like Zoo Racing, you’ll see this philosophy in action.
- Aggressive Front Splitters: These act like a snowplow for air, creating low pressure underneath to pull the front end down. The result is sharper, more responsive steering on corner entry.
- Pronounced Side Dams and Features: The complex shapes along the body’s sides help manage airflow, keeping it attached and preventing the kind of turbulence that can make a car feel unpredictable.
- Large, Detailed Rear Wings: The wing is your primary tool for generating rear downforce. It ensures the back of the car remains planted and stable through high-speed corners and under hard acceleration.
These bodies are the go-to choice for high-grip surfaces like carpet or treated asphalt, where cornering speed is everything. They provide the stability and predictability you need to push a nimble touring car chassis to its absolute limit.
The Low-Drag Philosophy of Pan Car Bodies
In contrast, pan car bodies are built for raw speed and aerodynamic efficiency. You'll see these in classes like World GT-R or on large, flowing circuits where top speed on the straights makes or breaks your lap time. A brand like Mon-Tech really nails this design approach.
A pan car body doesn’t fight the air; it slices through it. The goal is to minimize drag, allowing the motor to work as efficiently as possible to achieve the highest possible speeds.
Their shapes are typically much smoother and lower profile than their touring car counterparts. You’ll notice features like a low, sleek front end, a smooth cabin area, and a more integrated, less aggressive rear wing. This clean design reduces aerodynamic drag, which is essential for oval racing or tracks with long straights. By presenting a smaller profile to the wind, the car can reach higher top speeds, sacrificing some cornering grip for outright velocity.
Matching the right 1 10 rc car bodies to your racing class isn’t just a suggestion—it’s a fundamental part of building a competitive package.
Selecting the Right Body Material and Thickness
When it comes to 1 10 rc car bodies, the polycarbonate (often called Lexan) isn't a one-size-fits-all deal. The thickness of this material is a serious tuning option that completely changes how your car feels, handles, and survives on the track. Getting this trade-off right is fundamental to unlocking your chassis's full potential.
Your choice really boils down to two main camps: standard weight and lightweight. Each has a specific job to do and shines under different conditions. Picking the right one for your skill level and racing surface is just as critical as choosing the right tyre compound.
Standard Weight Bodies: The Durable Choice
Think of a standard weight body as the durable workhorse of your collection. Usually measuring around 0.7mm thick, this is your go-to for club racing, long practice days, and less-than-perfect tracks where a bit of rubbing is part of the game.
- Increased Durability: The thicker material holds up way better against cracks and tears from race incidents, making it a smarter, more economical choice for a long season.
- Chassis Stiffness: A standard body adds a touch of stiffness to the whole chassis assembly. This can make the car feel more stable and predictable, especially on lower-grip tracks.
- Forgiving Nature: If you're still honing your lines, the extra resilience means a small mistake won't automatically end your race day with a wrecked body.
For example, a solid option like the ZooRacing Hyrax LMH 0.7mm body gives you a reliable and consistent feel. It's perfect for dialling in a new setup on your Awesomatix or XRAY chassis without having to stress about fragility.
Lightweight Bodies: The Performance Option
A lightweight body is the agile specialist, engineered for pure performance when every gram is a liability. Coming in at around 0.5mm thick, these are built for high-level competition on smooth, high-traction surfaces where you need every last advantage.
The main reason to run a lightweight body is to lower the car's centre of gravity. By slashing weight from the highest point of the chassis, you cut down on body roll and let the car snap through direction changes more quickly and aggressively.
This weight reduction has another massive effect: it allows for more natural chassis flex. On high-grip carpet or asphalt, this extra flex can generate more mechanical grip, letting the car "bite" into the surface harder through the corners.
The result is a car that feels much more nimble and can carry way more corner speed—but it comes at the cost of durability. Choosing the right thickness isn't just about preference; it's a strategic decision that shows up on the lap timer.
Using Aerodynamics to Find More Speed
On the track, air isn't just empty space—it's a physical force you can bend to your will. For 1 10 rc car bodies, every curve, vent, and wing is a tool designed to manipulate that airflow. This is where we turn abstract concepts like downforce and drag into practical, trackside tuning adjustments that win races.
Think of your car's rear wing as an upside-down airplane wing. Instead of generating lift, it creates downforce, literally pushing the car into the track surface. This extra load on the tyres generates more mechanical grip and lets you carry much higher speeds through the corners. It’s the secret to making your car feel "glued" to the track in those high-speed sections.
Tuning Aerodynamic Balance
Great aero performance isn't about one single part; it’s about the balance between the front and rear of the car. A simple adjustment to your body's position or wing setup can completely change the handling to suit a specific track layout.
- Increase Front Grip: Shifting the body forward on its posts moves the aerodynamic centre of pressure toward the front. This can give you a more aggressive turn-in, perfect for those tight, technical infields.
- Increase Rear Stability: Moving the body rearward does the opposite, planting the back tyres more firmly. This is your go-to adjustment for long, sweeping corners where high-speed stability is everything.
Another incredibly powerful tool is the wing's gurney flap or wickerbill—that small L-shaped strip on the trailing edge. Adding a taller gurney significantly increases rear downforce, helping to settle a loose rear end when you get back on the power.
This visual breaks down the trade-off between standard (durable) and lightweight (agile) body options, which directly affects the car's centre of gravity and how it responds to aero forces.
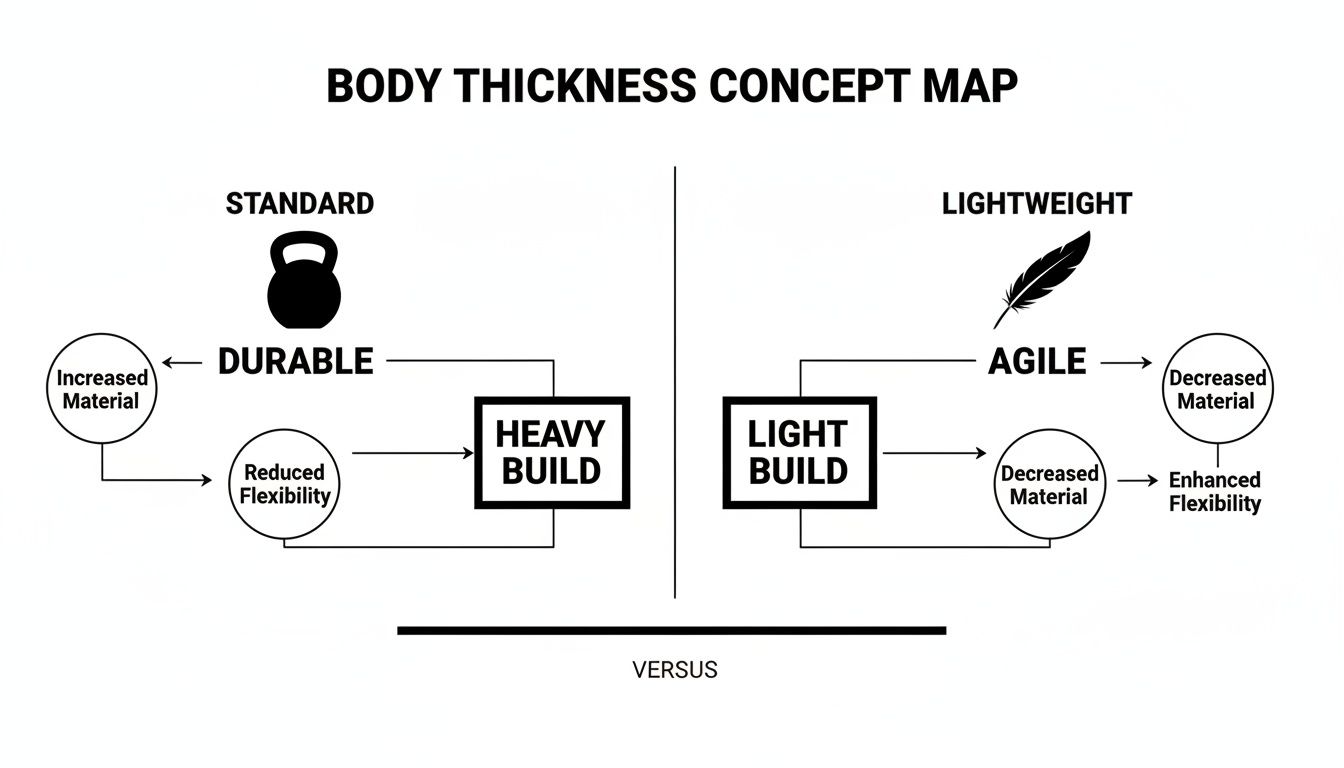 As you can see, a lightweight body lowers the car's centre of gravity, making it more responsive to both aerodynamic inputs and quick direction changes.
The Impact on the Track
These aren't just theoretical gains; they translate directly into faster lap times. At ROAR-sanctioned Canadian races, a staggering 82% of 1/10 pan car entrants have upgraded to lightweight lexan bodies. This move cuts overall vehicle weight by 15% on average and helps them hit top speeds of 45 km/h.
Our own data at Digital RC shows this trend clearly. Our high-performance 1/10 bodies from brands like Mon-Tech and Zoo Racing fly off the shelves, with over 60% of customers choosing clear versions so they can make their own aero tweaks. The result? They're finding up to 12% more cornering grip on indoor carpet tracks.
Top drivers don't just set their body and forget it. They constantly make small aero adjustments throughout a race weekend to adapt to changing grip levels and track conditions.
Mastering these small changes is what separates good drivers from the great ones. It’s about turning the invisible force of air into a real, tangible advantage that gives you the confidence to push harder and find those last few tenths on the stopwatch.
A Practical Guide to Mounting Your Body
A perfectly chosen body is useless if it’s mounted like a parachute. This is where your clear piece of Lexan becomes a functional, race-ready part of your car. Getting it right makes sure all your prep work pays off on the track, while a sloppy job can ruin a brand new shell before it even sees its first lap.
This guide will walk you through preparing and mounting a new clear body like a pro. With the right tools and a bit of patience, you can get clean trims, precise holes, and smooth wheel wells without the fear of cracking the polycarbonate. The goal is to turn what can be a stressful task into a simple, repeatable process.
Essential Tools for the Job
Before you start, grabbing a few key tools will make the entire process smoother and leave you with a much cleaner result. You don't need a massive workshop, just a handful of specialty items designed specifically for working with thin polycarbonate.
- Curved Lexan Scissors: These are non-negotiable. Their curved blades are made to cut smoothly along the contours of 1 10 rc car bodies, preventing those ugly, jagged edges you get with regular scissors.
- Body Reamer: This is the only way to make perfect, round holes for your body posts and antenna. A drill bit will grab and crack the Lexan almost every time, but a reamer gives you total control.
- Hobby Knife: You'll need this for scoring trim lines and cleaning up tight corners where scissors just can't reach. A fresh, sharp blade is crucial for clean cuts.
- Marking Pen: A fine-tip permanent marker is perfect for marking your cut lines and dotting your body post locations from inside the shell.
The Mounting Process Step-by-Step
With your tools laid out, it’s time to get to work. The key here is patience—measure twice, cut once. If you're new to this, a fantastic trick is to use an old, perfectly mounted body as a template for your new one.
- Mark Your Post Holes: Place the clear, uncut body over your chassis. Carefully line it up exactly where you want it to sit, then use your marker to dot the centre of each body post from underneath.
- Ream the Holes: Start with a small pilot hole using just the tip of your reamer. Slowly twist it, applying light pressure, until the hole is just the right size for the body post. Don't rush this step.
- Trim the Excess: Follow the faint trim lines moulded into the body with your Lexan scissors for the main cuts. For tight corners or tricky areas, score the line with your hobby knife and gently bend the plastic until it snaps cleanly.
- Cut the Wheel Wells: This is often the most intimidating part. A compass with a hobby knife attachment or a dedicated circle cutter will give you perfect arcs every single time.
Correct body positioning is a critical tuning adjustment. Setting the body height and its forward or rearward placement directly impacts handling. Lowering the body reduces the centre of gravity for less roll, while shifting it forward can increase front-end grip.
Ultimately, precise mounting is a skill that develops with practice. It not only ensures your car looks professional but, more importantly, allows it to perform consistently. For racers looking to optimize their setup even further, understanding how ultra-lite horizontal rear body mounts can improve performance is a great next step.
Painting Your Body for a Professional Finish
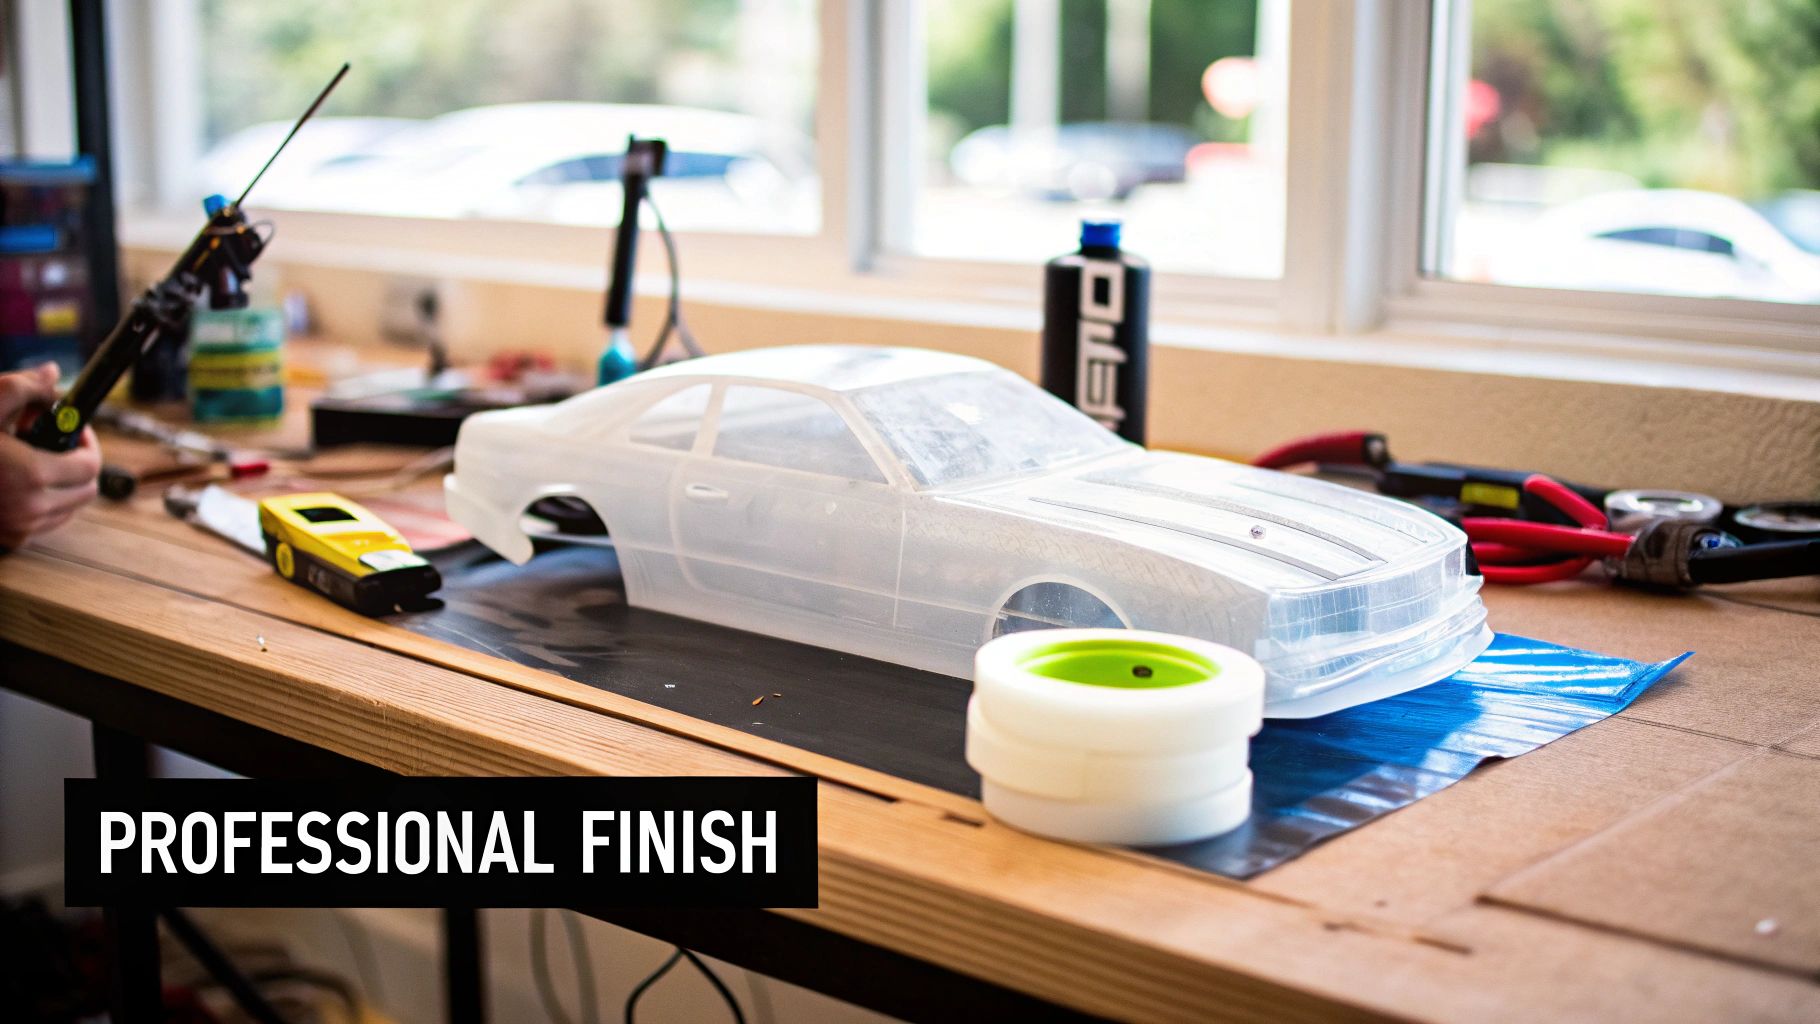
While raw speed wins races, a sharp-looking car is a huge part of the culture. A great paint job gives you pride in your machine, but it also has a practical benefit: it makes your car stand out on the track, helping you nail your lines lap after lap.
Getting that durable, pro-level finish on 1 10 rc car bodies comes down to good prep work and using the right materials. It all starts way before you even think about spraying any colour.
Preparation Is Everything
First things first: you have to prep the polycarbonate surface. Every new body comes with a clear overspray film on the outside and, more importantly, often has mould-release agents still clinging to the inside from the factory.
You absolutely must wash the inside of the shell with warm water and dish soap to get rid of any oils or residue. A perfectly clean surface is the only way to get proper paint adhesion. If you skip this, your beautiful paint job will start chipping and flaking after the first minor hit.
Remember: You are painting the inside of the clear body. This is the secret to a long-lasting finish—it protects the paint from scuffs, scrapes, and crashes, keeping your design looking fresh way longer than an exterior paint job ever could.
The Right Paint and Masking Techniques
You can't just grab any can of spray paint off the shelf. Standard paints won't bond to flexible polycarbonate; they'll crack and peel away almost immediately. You have to use paints specifically made for Lexan. If you're not sure where to start, our guide to Tamiya spray paint can point you in the right direction.
For crisp lines and intricate designs, a good quality masking tape or liquid mask is your best friend.
- Clean Lines: Lay down your masking tape and press the edges down firmly with a fingernail or a dull tool. This is crucial for preventing paint from bleeding underneath.
- Complex Designs: For more advanced jobs, liquid mask is the way to go. You paint it on the inside, let it dry, then carefully cut your design into the mask with a sharp hobby knife. From there, you just peel away sections as you paint each colour, always working from darkest to lightest.
If you're just starting out, even a basic guide to Acrylic Painting Techniques for Beginners can teach you fundamental skills like layering and blending that translate directly to this. Here's a pro tip: always back light colours like yellow or white with a thin coat of silver or white. It makes them pop and look truly vibrant and opaque on the track.
Common Questions About 1/10 RC Car Bodies
Even after you've got a handle on aerodynamics and setup, questions always pop up in the pits. We get asked about 1/10 RC car bodies all the time, so let's tackle a few of the most common ones with some straight-up answers that will help you on race day.
How Can I Make My Lightweight Body Last Longer?
Everyone loves a lightweight body for its performance, but they can be notoriously fragile. The secret to making them last is selective reinforcement.
A thin, even smear of Shoe Goo on the inside of the shell works wonders. Focus on the high-stress spots like around the body post holes, along the wheel arches, and across the front splitter. This adds a surprising amount of strength without piling on the grams.
For a true "bulletproof" practice body, lay down some drywall tape on the inside first, then coat it with Shoe Goo. This creates a super tough, flexible layer that can help a paper-thin shell survive a season of hard racing.
Which Body Is Best for a Low-Grip Track?
When the track is slick or dusty, you're fighting for every ounce of grip you can find. This is where a body with more aggressive aero comes into play.
Look for a shell with a more pronounced front splitter and a larger, more aggressive rear wing. These features will help push the car down onto the track surface, creating more downforce even at lower speeds. That extra downforce is exactly what you need to feel confident and stay planted on a loose surface.
Can I Repair a Cracked Body?
Absolutely. You can definitely save a cracked body, especially for practice days. The first step is crucial: stop the crack from getting worse by reaming a tiny hole right at its end. This relieves the stress.
Next, flip the body over and apply a patch of drywall tape over the crack on the inside. Finish it off by covering the tape with a generous layer of Shoe Goo. You'll end up with a strong, flexible repair that's ready for more abuse.
At Digital RC, we stock the latest race-proven bodies from the brands that win championships. Explore our curated collection of 1/10 RC car bodies and find the performance advantage you're looking for, with fast, same-day shipping across Canada.