
A Pro's Guide to Tamiya Spray Paint for RC Car Bodies
For any serious RC racer, a flawless, durable finish on a polycarbonate body isn't just nice to have—it's essential. For years, Tamiya spray paint has been the go-to for achieving that pro-level look, delivering vibrant colours and tough performance that holds up to the abuse of the track.
The right paint job makes the aggressive lines of a high-performance RC car body pop. It's the final touch on a build that represents countless hours of tuning and prep.
Why Tamiya Spray Paint Is a Legend in the RC Scene
When you’re prepping a top-tier touring car from XRAY or Awesomatix, the paint is more than just colour. Tamiya's reputation wasn't built on slick marketing; it's been earned in the pits and on the track through consistent, quality results that racers depend on.
The secret is in their purpose-built formulas. For us in the RC world, that means knowing one critical difference that can either make or completely ruin your paint job.
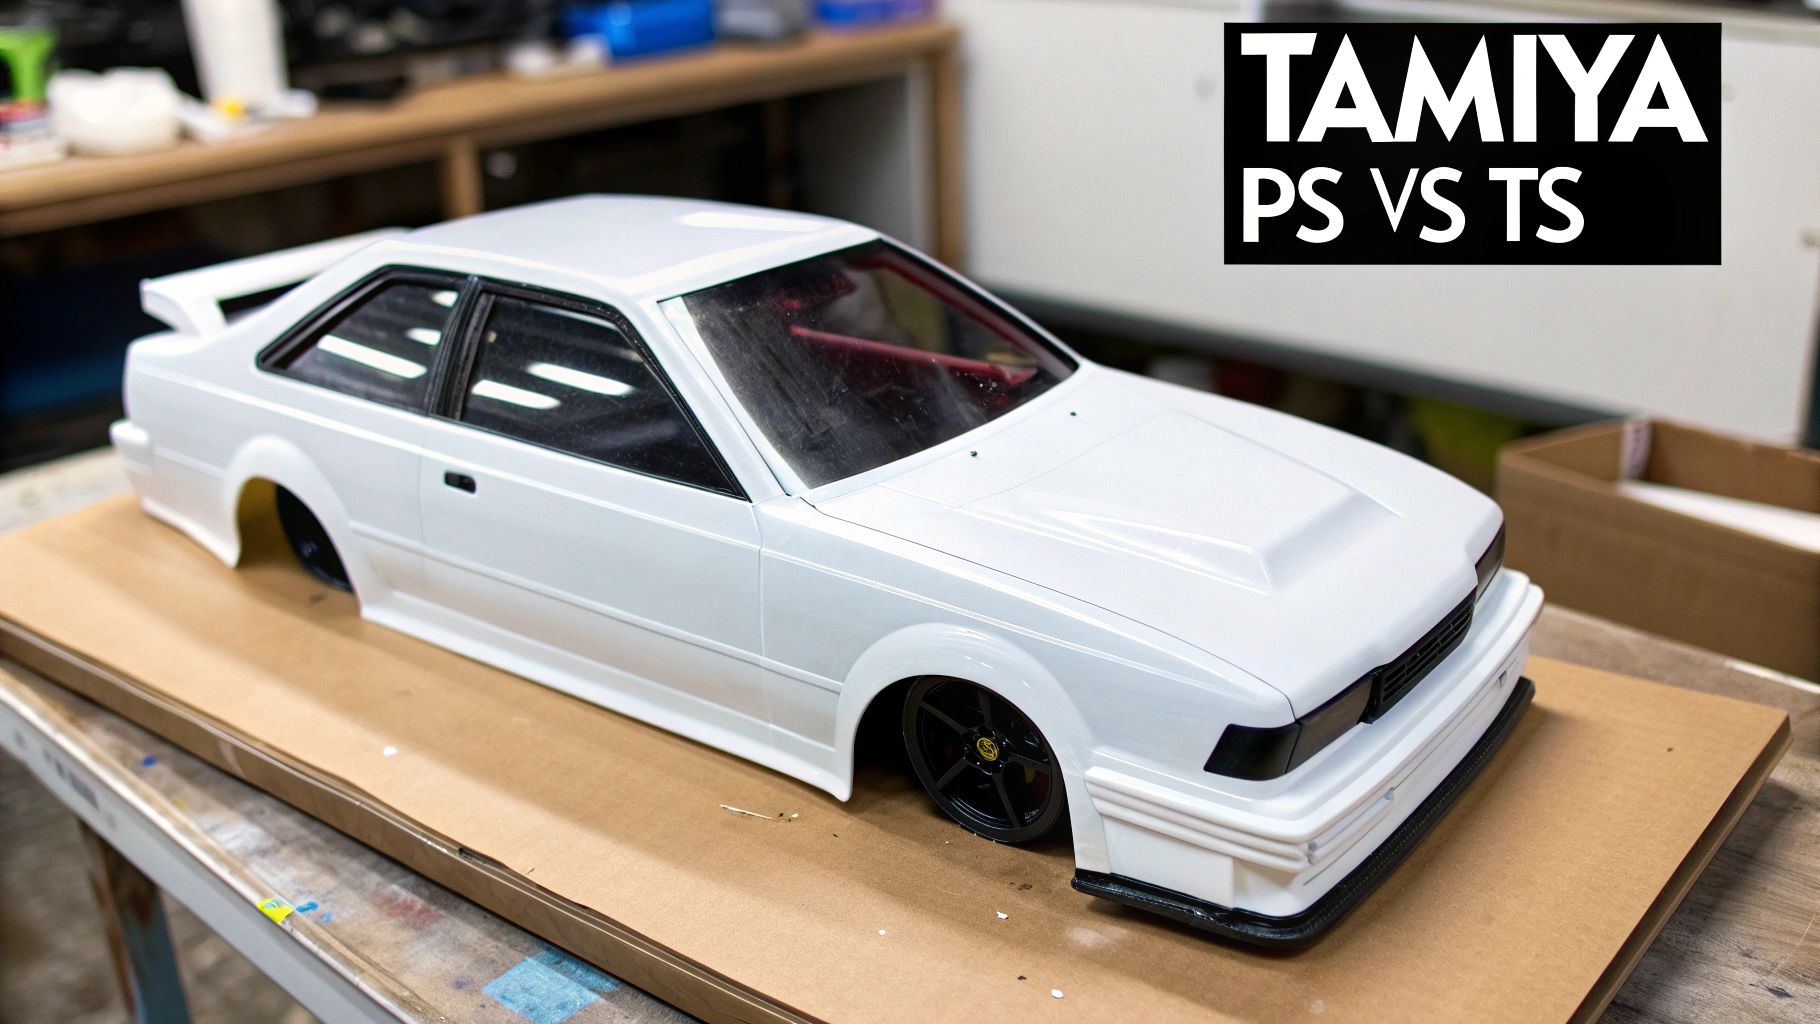
The Critical Difference: PS vs. TS Paint
The single biggest mistake newcomers make is grabbing the wrong can off the shelf. Tamiya makes two main lines of spray paint, and if you use the wrong one on a flexible RC body, you're in for a world of disappointment.
Let's break down the two main Tamiya spray paint lines so you know exactly what to look for.
| Paint Line | Primary Use | Binder Type | Flexibility | Best For (RC Components) |
|---|---|---|---|---|
| Tamiya PS | Polycarbonate | Etching, flexible | High | Clear Lexan/polycarbonate bodies (e.g., touring car, pan car) |
| Tamiya TS | Hard Plastic Models | Hard-curing lacquer | None | Static model kits, hard plastic accessories (wings, mirrors) |
This table makes it clear: when you're painting your main race body, only PS paints will do the job.
-
Tamiya PS (Polycarbonate Spray): This is the only paint you should ever use on a clear Lexan RC car body. Its formula is designed to etch into the polycarbonate, creating a bond that allows it to flex with the material. This is non-negotiable for racing—it prevents the paint from cracking, flaking, or shattering during impacts.
-
Tamiya TS (Tamiya Spray): This line is for static plastic models, like those incredibly detailed scale tanks or airplanes. It dries to a hard, rigid finish with zero flex. If you accidentally spray this on a polycarbonate body, the first little tap or vibration will cause the paint to crack and peel right off. All that work, gone.
For racers running premium bodies from brands like Bittydesign, Protoform, or Zoo Racing, sticking with the PS line is the only way to make sure your custom livery survives a race weekend.
Pro Tip: Always, always spray Tamiya PS paints on the inside of the clear polycarbonate body. The Lexan itself acts as a super durable, high-gloss clear coat, protecting your paint job from scratches, fuel, and track rash.
The Supply Situation for Canadian Racers
Unfortunately for us in Canada, getting Tamiya spray paint has become a major headache. New federal regulations on Volatile Organic Compounds (VOCs) put a stop to the importation of these paints in early 2023, leaving a huge gap in the market.
This ban really shows how deeply Tamiya was embedded in our hobby. Before the restrictions, it's estimated that Tamiya sprays held a 65% market share for paints used on 1/12 pan car and 1/10 touring car bodies in Canada. With a massive range of colours and a formula that was dry to the touch in under 15 minutes, it was the number one choice for racers prepping for big events.
This guide is meant to be a masterclass for Canadian racers. We'll dive into the best practices for applying any Tamiya paint you still have, ensuring you get that pro finish every single time. We'll also help you navigate the new landscape by pointing you toward effective, compliant alternatives available right here.
Flawless Foundations: Your Polycarbonate Body Prep
A championship-level paint job is built long before you ever shake a can of Tamiya spray paint. The real secret to a tough, vibrant finish that survives the abuse of racing is all in the prep work. This isn't a suggestion; it's the single most critical part of painting a polycarbonate body. Skipping these steps is the number one reason paint flakes off, peels, and bubbles up later.
Every new, crystal-clear RC body, whether it's for a high-strung Awesomatix touring car or a nimble XRAY pan car, comes coated with an invisible enemy: mould release agent. It’s an oily film left over from manufacturing, and if you don't get rid of it completely, your expensive Tamiya PS paint won't have a thing to stick to.
Starting with a Clean Slate
Your first and most important step is a good wash. Nothing fancy is needed here—warm water and a basic dish soap are perfect. These soaps are designed to cut right through grease and oil, which is exactly what you need to break down that mould release agent.
Gently scrub the entire inside surface of the body with a soft cloth or a sponge. Make sure you get into all the deep crevices and complex curves where that oily residue likes to hide. Once you’re done, give it a thorough rinse with clean water and let it air dry. If you're in a hurry, you can use a lint-free microfibre cloth to pat it dry.
Key Takeaway: Whatever you do, don't touch the inside of the body with your bare hands after washing it. The oils from your skin can ruin the surface just as much as the mould release agent, causing those awful "fisheyes" and creating spots where the paint just won't stick.
Creating the Perfect Mechanical Bond
While Tamiya PS paint is formulated to bite into polycarbonate, you can give it a massive helping hand by creating a mechanical bond. This just means lightly scuffing the inside surface of the body. You’re not trying to create deep scratches, just giving the smooth plastic a fine "tooth" for the paint to lock onto.
You've got a few options for this:
- Fine-Grit Sandpaper: A piece of 800 or 1000-grit sandpaper, used very gently, works well.
- Scouring Pad: A grey or white Scotch-Brite pad is fantastic. It's abrasive enough to create a key but won't leave heavy, visible marks through the paint.
- Specialty Tools: For racers chasing perfection, a dedicated tool can make a real difference. Using something like the MR33 Body Grinding Tool gives you consistent and even scuffing over the whole surface, building a perfectly uniform foundation for your paint.
After scuffing, it’s absolutely critical to wash the body a second time. This gets rid of all the fine plastic dust you just created. Any particles left behind will get trapped in the paint and leave you with a rough, gritty finish.
Precision Masking for Sharp Liveries
Masking is where your design comes to life. It's what separates sharp, clean panel lines and graphics from a blurry mess. Rushing this process is a surefire way to get fuzzy edges and paint bleeds.
Start with the window masks that came with your body kit. For your own designs, you can't beat high-quality masking tape. Tamiya's own masking tape is an excellent choice, as its adhesive is made to work with their paints and won't leave a sticky residue behind. We recommend the high-quality tape from Bittydesign for its sharp lines and clean removal.
When you apply the tape, lay it down and then use a soft tool—like a pencil eraser or even your fingernail—to burnish the edges. This just means rubbing them down firmly to create a rock-solid seal against the polycarbonate. This one simple action is the most effective way to stop paint from bleeding underneath the tape.
For complex curves or large areas, liquid mask is a fantastic option. You paint it on, let it dry into a rubbery film, then carefully cut your designs with a sharp hobby knife. Just be careful not to press too hard—you only want to score the mask, not the Lexan underneath. While they're typically for hard bodies, understanding the tech behind different types of aerosol primers can be insightful for achieving superior adhesion. With your body perfectly clean, scuffed, and masked, you're ready for the fun part—laying down some colour.
Alright, with your polycarbonate body fully prepped, you’re on the verge of turning that clear shell into a custom work of art. This is where your skill with a can of Tamiya spray paint really shines, and where control and consistency become your best friends.
Getting a professional result isn’t about just pointing and spraying. It’s a delicate dance, and the environment you paint in plays a huge role. An ideal spot is a well-ventilated space, like an open garage or a sheltered spot outdoors, where you're protected from wind and dust.
Creating the Ideal Painting Environment
Temperature and humidity are the two big ones you need to watch. Tamiya paints love moderate conditions—think somewhere between 18°C and 25°C with low humidity. If it’s too cold, the paint won’t atomize properly coming out of the can, leading to a sputtering, uneven coat. High humidity is even worse; it traps moisture in the paint as it dries, which can cause a cloudy or 'blushed' finish that completely dulls your colour.
Safety is non-negotiable here. The propellants and solvents in these cans mean you need proper ventilation. Always wear a respirator mask designed for paint fumes and make sure there’s a good flow of fresh air.
Now for a crucial pro tip before you lay down that first mist of colour: warm the spray can. Just pop it in a bowl of warm (not hot!) water for about 10-15 minutes before you start. This simple step bumps up the internal pressure, helping the paint atomize into a super-fine, consistent mist. The payoff is a much smoother application and way less risk of splattering.
This quick diagram breaks down the essential prep work that comes before you even touch that spray can.
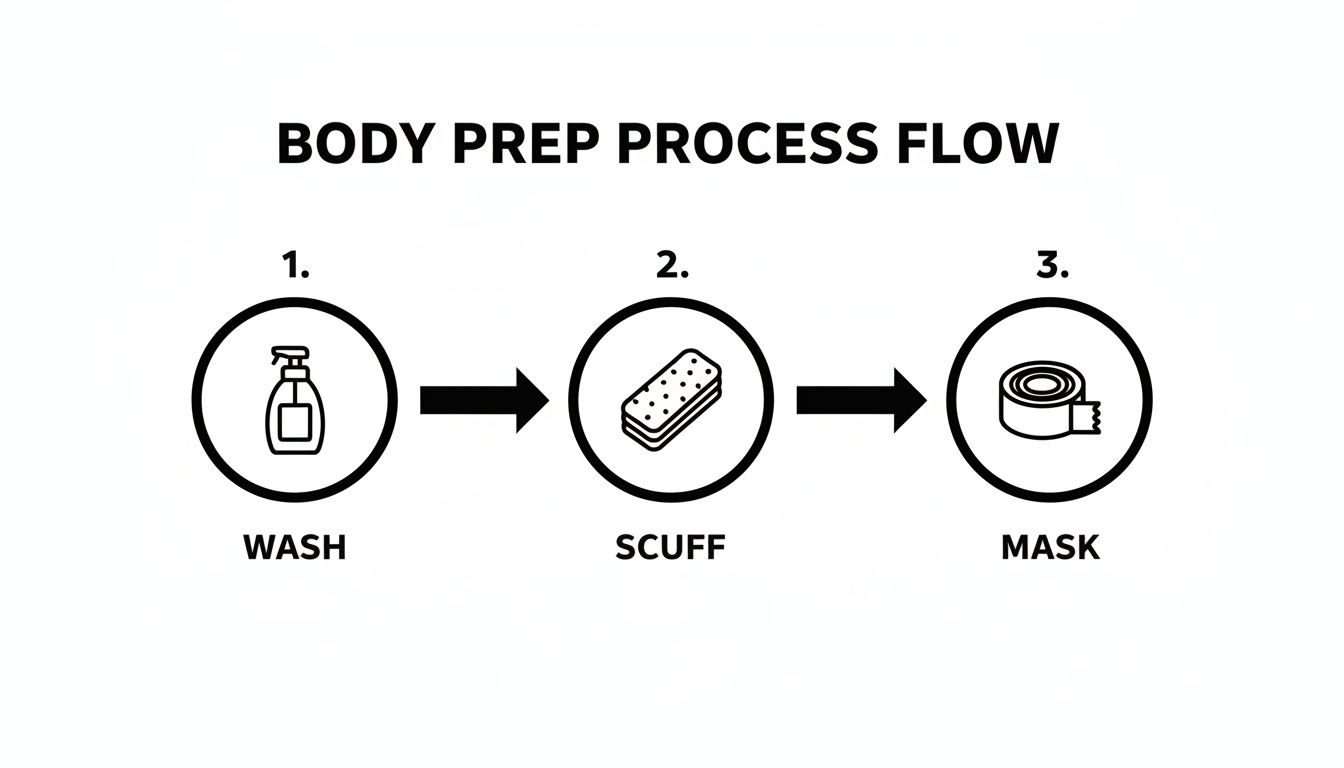
It’s a great reminder that an amazing paint job is always built on a foundation of meticulous washing, scuffing, and masking.
The Art of the Perfect Coat
The secret to a glass-smooth finish isn’t one thick, heavy application. It's all about building up a series of light, deliberate coats. This approach gives you total control and helps you dodge the most common painting disasters.
Hold the can about 25-30 cm (10-12 inches) from the body. This distance is critical. Get too close, and the paint will pool up, causing drips and runs. Too far, and the paint starts drying mid-air before it even hits the surface, leaving you with a rough, sandy texture known as 'orange peel'.
Always start each pass by spraying just off the edge of the body. Move smoothly across the area you're painting, and don't let go of the nozzle until you’re past the other side. This technique prevents ugly, thick buildup at the start and end of each stroke.
Key Takeaway: Patience is everything. Your goal is multiple light mist coats, not one heavy, wet one. The first coat shouldn't even provide full coverage; think of it as a light "tack" coat that gives the next layers something to grab onto.
Give it about 10-15 minutes between each light coat. This lets the solvents "flash off" and allows the paint to get tacky. You'll see the colour's richness and opacity build up gradually. Usually, three or four light coats are all you need for vibrant, full coverage without worrying about sags or runs.
Building Colour Depth and Vibrancy
Once your main colour is down, there's one final step that takes a good paint job and makes it great: backing. This is simply applying a final colour over your main one to seal it and boost its appearance from the outside. The backing colour you choose makes a massive difference.
Here’s the go-to approach used by experienced painters:
- For Light or Fluorescent Colours: If you're using bright yellows, oranges, or neons, back them with a light coat of white. It makes them pop like crazy. Without it, they can look thin and washed out.
- For Dark or Metallic Colours: For deep blues, blacks, or gunmetal, backing with a final coat of black adds an incredible depth and richness to the finish.
- For General Purpose: A light coat of silver is a fantastic universal backing colour. It brightens up most standard shades and can add a subtle metallic flake to translucent colours.
This final layer not only makes your colours pop but also adds a durable layer that protects your hard work from scratches. If you really want to level up, it helps to draw on a wider base of knowledge, including professional paint and decorating tips for achieving truly flawless finishes. Nailing these techniques will give your RC car that durable, eye-catching look that really stands out at the track.
Curing Times and Finishing Touches
After that last coat of Tamiya paint goes on, the hardest part of the job begins: waiting. This is where a painter’s discipline really shows, and where a good paint job becomes a great one.
Rushing the final stages—curing, demasking, and detailing—is the fastest way to ruin hours of work. A fingerprint forever embedded in tacky paint or a decal that just won't stick are frustrations you can easily avoid with a little patience and an understanding of how paint actually works.
Touch Dry Versus Fully Cured
One of the biggest mistakes I see people make is confusing "touch dry" with "fully cured." They sound similar, but they're worlds apart, and getting it wrong can seriously compromise the durability of your new paint job.
-
Touch Dry: This is just the initial surface evaporation of the solvents. The paint film won't feel sticky to a quick, light touch. With Tamiya PS paints, you'll hit this stage in about 10-15 minutes under ideal conditions. It's the bare minimum time you should wait between coats.
-
Fully Cured: This is when the paint has completely hardened through polymerization. All the solvents are gone, and the paint has reached its maximum hardness and chemical resistance. This is when your body is truly ready for decals, handling, and the abuse of the track.
Tamiya PS paint needs a full 24 to 48 hours to fully cure. If you handle the body too much, slap on decals, or mount it before then, you risk smudges, soft spots, and adhesion problems down the road.
The Art of a Clean Demasking
Once your final backing coat is touch dry, it's time for the big reveal. The way you remove your masking is what separates razor-sharp lines from fuzzy, bleeding edges.
Here’s the golden rule: pull the tape while the last coat is still fresh—not wet, but definitely not rock hard. If you let the paint fully cure, it can form a solid film over the tape. When you pull it off, you'll likely chip or peel chunks of your new paint right along with it, leaving a jagged, amateur-looking line.
For the cleanest possible results, pull the masking tape back on itself at a sharp, low angle. Don't pull straight up, as this puts a ton of stress on that fresh paint edge. Go slow, be deliberate, and take extra care around tight curves and complex parts of your design.
Applying Decals for a Pro Look
After letting the paint cure for at least 24 hours, you can finally add the details that bring your car to life. Applying sponsor decals from iconic brands like Hobbywing or Sanwa gives your shell that authentic, professional look you see in the winner's circle.
Before you start, make sure the surface is spotless. A quick wipe with a microfibre cloth will remove any lingering dust. For perfect placement, try the "wet method": lightly mist the body with water and a single tiny drop of dish soap. This lets you slide the decal into position before squeegeeing out the water. This technique is a lifesaver for applying large graphics to a brand-new, clear shell like the popular Team C Special Twist 1/10 Touring Car Body.
Unfortunately, RC hobbyists in Canada now face a major hurdle in sourcing these paints. In early 2023, the Canadian government banned the importation of Tamiya spray paints due to their high Volatile Organic Compounds (VOCs). This decision, enforced by Environment and Climate Change Canada, has driven a reported 25% increase in demand for compliant alternatives and makes mastering your technique with any remaining stock you have even more critical.
Troubleshooting Common Paint Job Problems
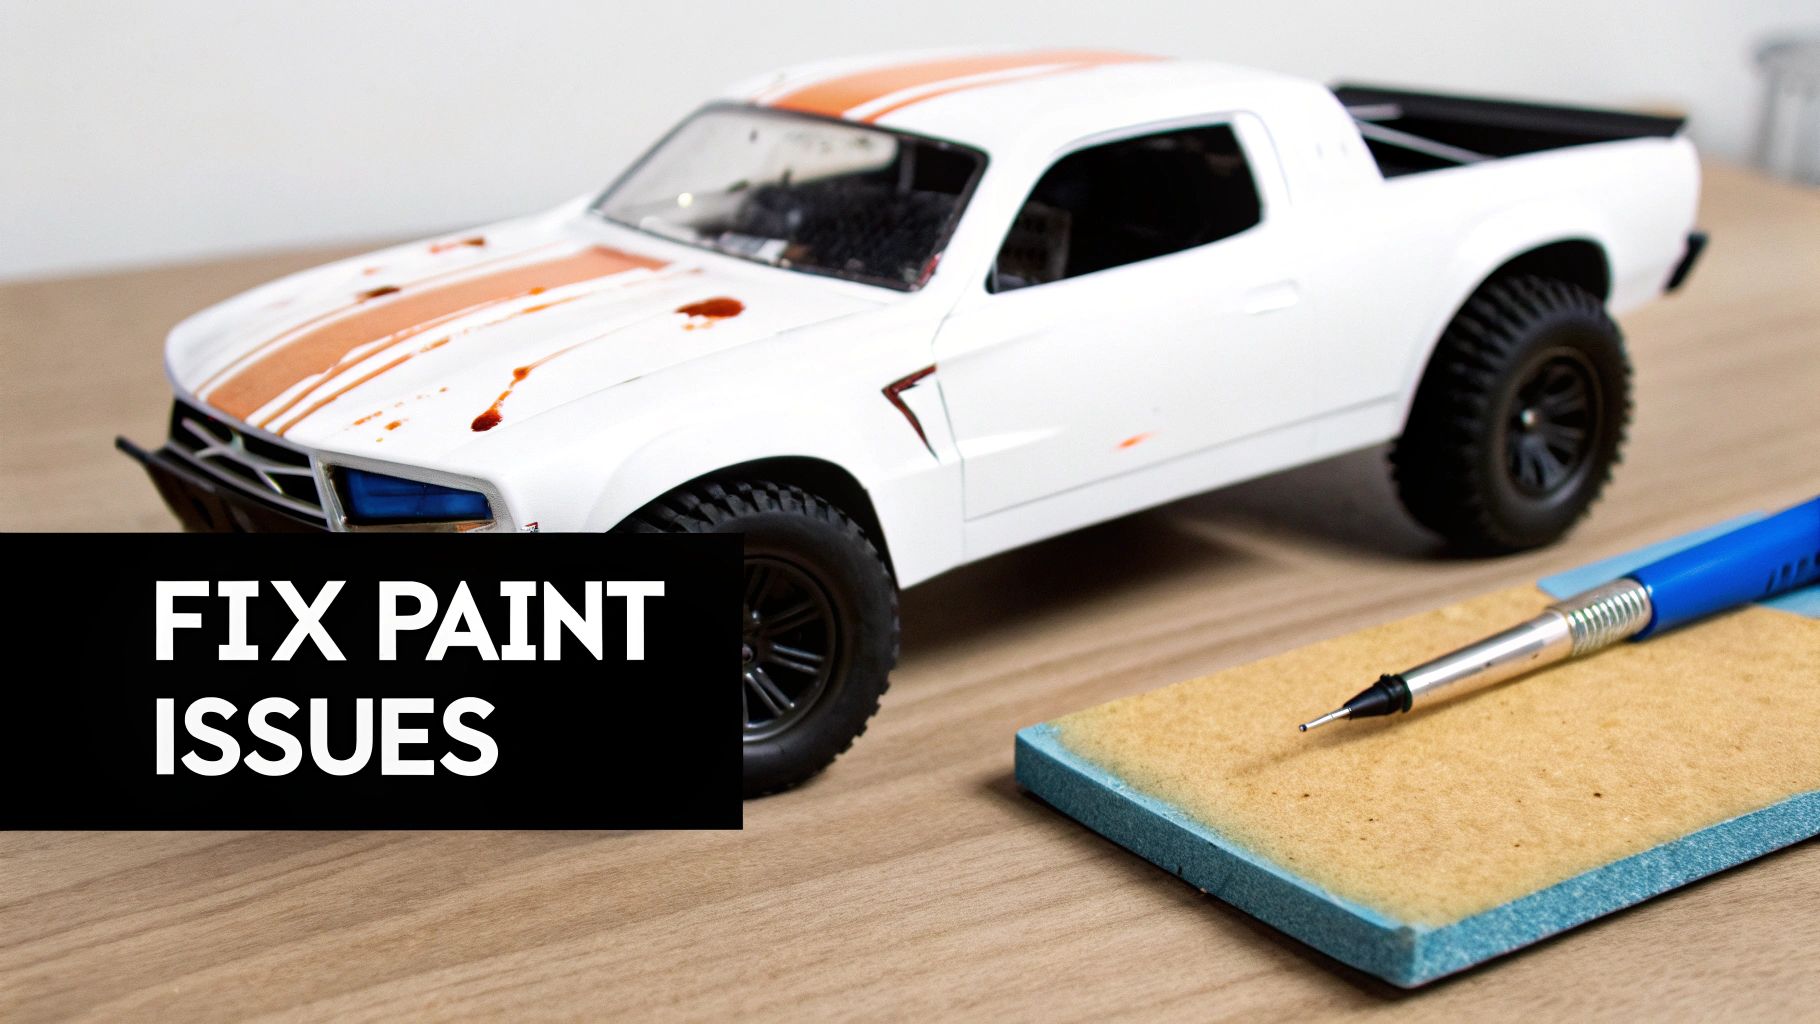
Even with the best prep work and a steady hand, things can still go sideways. A sudden change in humidity, a gust of wind, or just a moment of distraction can mess up an otherwise perfect finish. But don't panic—most common issues are fixable if you know the right way to tackle them.
This is your guide to diagnosing and fixing the most frequent problems you’ll encounter with Tamiya spray paint. Think of it less as a disaster and more as a learning experience. The trick is to identify the problem correctly, because fixing a paint run is completely different from dealing with flaking.
Identifying and Fixing Paint Runs or Sags
A paint run—that classic drip that ruins a smooth surface—is one of the most common frustrations. It almost always happens from putting down too much paint too fast, spraying too close to the body, or not giving enough flash time between coats.
The most important rule here? Let the paint fully cure before you even think about touching it. Trying to wipe a wet run will only smear it into a much bigger mess. Give it a solid 48 hours for the Tamiya PS paint to completely harden.
Once it's cured, you can level the run by wet-sanding it.
- Grab Fine-Grit Sandpaper: You'll want a small piece of 1500 or 2000-grit waterproof sandpaper.
- Lubricate the Surface: A few drops of soapy water on the area will do the trick.
- Sand Gently: Wrap the paper around a small, hard block (a pencil eraser works great) and sand only the high spot of the run. Use light pressure and let the sandpaper do the work until the run feels flush with the rest of the paint.
It takes patience, but you can completely save the paint job. Since you're painting the inside of a clear body, this fix is only visible from the inside, but it gives you a smooth surface for any backing colours you plan to add.
Correcting Orange Peel Texture
Orange peel is that pebbly, textured finish that looks exactly like its name suggests. This happens when the paint droplets start drying in the air before they even hit the polycarbonate, which stops them from flowing together into a smooth, level coat.
What causes it?
- Spraying from too far away. The paint loses too much solvent on its way to the body.
- High temperatures or low humidity. Both can dramatically speed up the drying time.
- Applying a coat that's too light or misty. A "dry" coat won't have enough volume to flow out properly.
Pro Tip: Fixing orange peel on a lexan body is tough because you can’t polish the painted surface directly. Prevention is really your best bet here. Make sure your can is properly warmed, spray from that sweet spot of 25-30 cm, and apply your final coats just a little wetter (but not so heavy they run!) to help the paint level itself out.
Dealing with Paint Flaking and Fisheyes
If you see your paint flaking or peeling off, the problem started long before you picked up the spray can. This is a classic case of adhesion failure—the paint never bonded properly to the polycarbonate surface. In 99% of cases, this points directly back to improper prep. Either the mould release agent wasn't completely washed off, or oils from your hands contaminated the surface.
Similarly, "fisheyes"—those small, crater-like dots where paint pulls away from a central point—are also caused by surface contamination from things like oil, silicone, or even a speck of dust.
Unfortunately, there's no easy fix once you have widespread flaking or fisheyes. The only real solution is to strip the paint off and start over, paying extra close attention to the washing and scuffing steps. It's a tough pill to swallow, but it’s the only way to guarantee your next attempt has the solid foundation it needs to last.
Your Top RC Painting Questions Answered
When it comes to painting polycarbonate, you'll find tons of conflicting advice on forums and at the track. It can be hard to know what actually works. To cut through the noise, we've put together answers to the most common questions we hear from competitive racers.
These are the straight-up, practical answers you need to get a durable, track-ready finish on your high-performance touring and pan cars.
Can I Use Tamiya TS Paint On My RC Car Body?
This is easily the most critical question, and the answer is simple: absolutely not. Using Tamiya TS (Tamiya Spray) paint on a flexible polycarbonate or Lexan body is a guaranteed recipe for disaster.
TS paints are hard-curing lacquers made for static plastic models. They have zero flex. The first time your car takes a hit or the body flexes over a bump, that paint will crack, spiderweb, and flake right off, completely ruining all your hard work.
Always, always use the Tamiya PS (Polycarbonate Spray) line for your RC bodies. Its unique chemical formula is designed to etch into and bond with the polycarbonate, allowing the paint to flex right along with the body during the abuse of racing.
How Do I Get My Tamiya Paint To Stick Better?
If you're having trouble with paint adhesion, the problem almost always lies in your prep work. A flawless, long-lasting paint job is 90% preparation and only 10% spraying. Getting that perfect bond comes down to two key steps.
First, you have to wash the inside of the new body. Use warm water and a good dish soap to completely strip away any mould release agent left over from the manufacturing process. This invisible oily film is the number one enemy of paint adhesion and the main cause of flaking.
Second, for an even stronger mechanical bond, scuff the entire inner surface. A grey Scotch-Brite pad or fine-grit sandpaper—around 800-grit—is perfect for giving the smooth plastic a fine "tooth" for the paint to grip onto. This extra step makes a massive difference in the paint's long-term durability.
What Is Paint Backing and Why Is It Important?
Backing is just applying a final, neutral colour over your main paint scheme. It’s a simple pro technique that seals your design, protects it from scratches, and makes your primary colours look way better from the outside. It’s what separates a good paint job from a great one.
The backing colour you choose directly changes how your main colours look. For example, backing a fluorescent yellow or orange with a light coat of white will make it look incredibly bright and solid. Without backing, those colours often look thin and almost see-through under track lighting.
Here’s a quick guide on which backing colour to use:
- Light & Fluorescent Colours: Always back with white. It makes them pop.
- Dark & Metallic Colours: Back with black. It adds incredible depth and richness.
- General Use: Silver is a fantastic all-around backing colour that brightens up most shades.
Think of it as the final seal of quality for your custom livery.
Ready to create a professional-grade finish on your next build? At digital-rc, we stock the essential tools, accessories, and high-performance bodies you need to achieve a flawless paint job. Explore our curated selection of top-tier RC gear today. Find everything you need at https://digital-rc.ca.