
Tamiya Paint Primer A Pro Guide to Perfect RC Body Finishes
If you're a competitive RC racer in Canada, you've probably noticed a critical part of your painting arsenal has completely vanished. For years, the Tamiya paint primer from their PS spray can lineup was the go-to for getting a perfect, track-ready finish on polycarbonate bodies. Now, it's just gone.
Why Your Favourite Tamiya Spray Primer Disappeared
For anyone who takes RC painting seriously, the sudden disappearance of Tamiya spray cans was more than just a supply hiccup—it threw a wrench into a proven workflow. Racers counted on these specific primers for their bulletproof consistency and flawless compatibility with Tamiya's own polycarbonate paints. All of a sudden, getting that pro-level look on a new Mon-Tech or Zoo Racing body became a huge headache.
This wasn't some decision from Tamiya or the distributors. It all came down to new federal regulations. The problem is something called Volatile Organic Compounds (VOCs)—chemicals that evaporate into the air and can impact health and the environment. A lot of aerosol products, especially hobby sprays, use VOCs as a propellant to get that fine, even mist.
The Regulatory Crackdown
The Canadian government brought in much stricter limits on the amount of VOCs allowed in consumer aerosol products. One of the main chemicals they targeted was Dimethyl Ether, a popular propellant that Tamiya used heavily in its spray lineup because it worked so well. Unfortunately, the concentration in their products was just too high to meet the new legal standard.
This change hit hard and fast. In September 2024, the government officially banned the import of all Tamiya spray products, including the indispensable PS range primers. As of September 24th, 2024, the tap was turned off. All new shipments stopped, leaving distributors to deal with their existing stock under the new rules. Shops could sell what they had on their shelves, but once that stock ran out, it was gone for good.
This shift means the trusty aerosol cans Canadian racers have relied on for years are no longer an option. That dwindling supply on store shelves is the last of an era, forcing the whole community to rethink how we prep and paint our bodies.
The New Reality for RC Painters
The ban has forced an evolution in how we approach body painting here in Canada. It's not about trying to find some hidden stash of old spray cans anymore. It's about switching over to new tools and techniques that don't just comply with the rules but actually give you better control and a cleaner result. The conversation has shifted from the convenience of an aerosol can to the precision you get from airbrushing with compliant, bottled primers.
For a closer look at the whole situation, you might want to read our full breakdown of the Tamiya spray paint issue. It’s key context for understanding why the fully compliant solutions now available are the superior way forward for achieving that perfect finish.
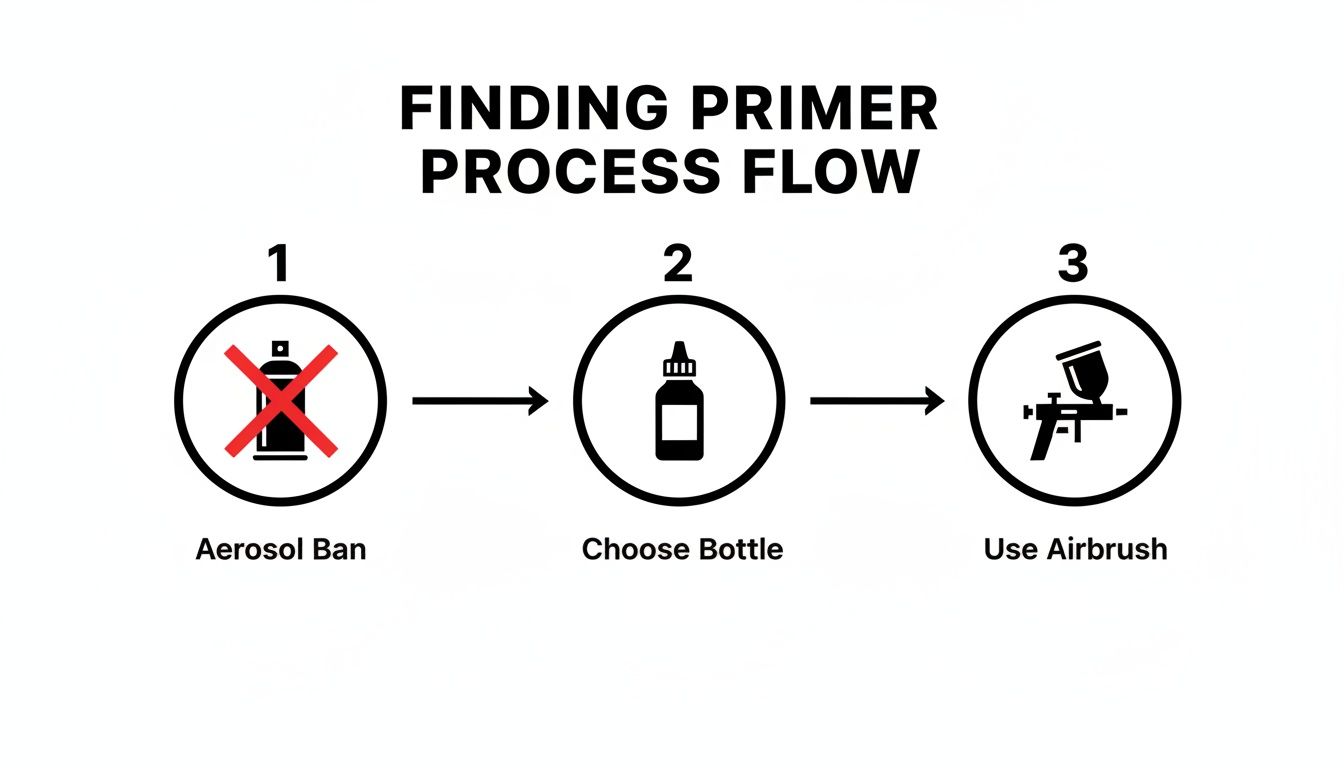
So, Tamiya's aerosol primers are officially a no-go in Canada. For any serious racer, this isn't just an inconvenience—it's a roadblock. We're not looking for a "good enough" fix; we need a new process that delivers the same tough, flawless finish our competition cars demand.
The answer isn't some obscure third-party brand. It's about shifting from spray cans to the precision of an airbrush, using primers that were here all along.
The Pro-Level Solution: Bottled Lacquer Primers
Ironically, Tamiya itself provides the perfect alternative. While the PS spray cans are banned, their line of bottled primers is completely compliant and ready to go. Products like Tamiya's Liquid Surface Primer are lacquer-based and engineered to work seamlessly with the entire Tamiya paint system. This isn't a workaround. It's an upgrade.
Switching to an airbrush gives you total control. You can lay down whisper-thin coats that preserve every fine detail on a lightweight 1/12 pan car shell, or build up a solid, even foundation on a hard-wearing 1/10 touring car body. No more one-size-fits-all spray patterns.
These lacquer primers chemically bite into the polycarbonate, creating a bond that just doesn't chip or flake, even after a rough race day. You get a micro-fine, perfectly smooth surface that makes your Tamiya PS colours pop and keeps your masking lines razor-sharp.
We've seen this shift happen across the Canadian RC scene. After the ban, veteran painters immediately switched to Tamiya's 10ml bottled primers, which are legal and have low VOC content. This drove up sales of airbrush thinners and compressors by 30-50% at some shops. Meanwhile, the guys holding out for aerosols were in trouble. Stock alerts started hitting in 2025, and by early 2026, border seizures of attempted imports were at 95%. This pushed hobby spending toward local, compliant options, which saw a 25% year-over-year jump. You can read more about the fallout from the ban on Fusion Scale Hobbies' blog.
Primer Selection Guide For Canadian RC Racers
For polycarbonate RC bodies, the choice is clear. The superior adhesion and durability of Tamiya's lacquer-based primer make it the professional's choice for a finish that stands up to the rigors of racing. Here’s a quick look at why it’s the go-to solution.
| Primer Type | Recommended Use | Compatibility (Paint) | Drying Time | Notes |
|---|---|---|---|---|
| Tamiya Liquid Surface Primer (Lacquer) | Polycarbonate RC bodies and hard plastic parts requiring maximum durability. | Excellent with Tamiya PS (polycarbonate) and TS/LP (lacquer) paints. | Fast (15-30 mins to touch) | Creates a very hard, smooth finish ideal for racing. Requires lacquer thinner for thinning and cleanup. |
| Other Primers (Acrylic) | General modelling, hard plastics, and situations where low odour is critical. | Best with acrylic paints. Can be used under PS paints but requires perfect prep. | Slower (Can take 1-2 hours to fully cure) | Less "hot" than lacquer, meaning adhesion to slick polycarbonate can be less robust for racing applications. |
For on-road RC car bodies that flex and take impacts, the superior adhesion and hardness of a lacquer-based tamiya paint primer is almost always the better choice. It ensures your carefully painted livery stays intact lap after lap.
Yes, making the switch means investing in a basic airbrush setup. But the benefits are huge. You get access to a superior, compliant tamiya paint primer, achieve a much more professional result, and future-proof your painting process against any more rule changes.
Mastering the Airbrush Priming Method
If there's one upgrade that will completely transform your painting workflow, it's switching from an aerosol can to an airbrush. It’s a game-changer. The precision and control you gain are on another level, unlocking a truly professional finish that a rattle can just can’t replicate. While it might look intimidating, mastering the airbrush for your Tamiya paint primer is surprisingly straightforward once you nail the process.
This workflow is all about moving past the old ways and embracing modern techniques.
For Canadian RC painters, this isn't just an upgrade—it's a necessity. With aerosol primers now off the table, the path forward is with superior, compliant bottled primers applied with the control only an airbrush can offer.
Perfect Preparation for Polycarbonate
Let’s be clear: before a single drop of primer hits your RC car body, proper surface prep is non-negotiable. This groundwork is what creates a solid chemical bond between the primer and the polycarbonate. Skip it, and you’re setting yourself up for chipping and flaking after the first hard race.
First, you need to scuff the inside of the shell. Grab a fine-grit abrasive pad, like a red Scotch-Brite pad, and lightly dull the entire surface. You're not trying to sand it down, just knock off that glossy sheen. This creates a microscopic texture for the primer to bite into.
Next comes a thorough cleaning. Wash the body with warm water and a bit of mild dish soap to get rid of any mould release agents from the factory and oils from your hands. Dry it completely with a lint-free microfibre cloth—you don’t want any stray fibres messing up your finish.
Thinning Primer for a Flawless Flow
Unlike the shake-and-spray cans, bottled primers like Tamiya's Liquid Surface Primer have to be thinned before they’ll work in an airbrush. Getting the consistency right is the secret to avoiding splatters or a thick coat that buries all the fine details. The goal is a consistency similar to 2% milk—thin enough to flow perfectly but with enough pigment to provide solid coverage.
When you're working with Tamiya's lacquer-based primer, you absolutely must use the right thinner.
- Primer: Tamiya Liquid Surface Primer (White or Grey)
- Thinner: Tamiya Lacquer Thinner (the one with the yellow cap)
- Ratio: Start with a 1:1 ratio of primer to thinner. That’s the sweet spot for most setups. Some guys might tweak it up to 1.5 parts thinner to 1 part primer if they want an even finer mist.
Always mix your primer and thinner in a separate, clean container, not directly in your airbrush cup. This guarantees it's perfectly blended before you start spraying.
Pro Tip: Never, ever use acrylic or enamel thinners with a lacquer-based primer. It’s a recipe for disaster. The primer will turn into a gummy, useless mess, and you risk damaging your airbrush. Stick with Tamiya's own lacquer thinner for consistent, predictable results every time.
Airbrushing Technique for Even Coats
Alright, your primer is mixed and your body is prepped. It's time to lay down some paint. The key to a great airbrush finish is building up thin, even layers. Don't try to get full coverage in one heavy pass.
Set your air compressor to a pressure between 20-25 PSI. This is enough force to atomize the primer properly without being so aggressive that it starts to dry mid-air before hitting the surface.
Hold the airbrush about 4-6 inches (10-15 cm) from the polycarbonate. Start your pass off the body, press the trigger down to start the primer flow, and move smoothly and consistently across the area you're painting. Critically, don't release the trigger until your hand is past the edge of the body. This prevents blobs at the start and end of your stroke.
Apply your primer in light, overlapping passes, with each new pass covering about 50% of the previous one. This methodical approach is what stops runs from forming and builds a perfectly uniform foundation for your colour coats. Give each coat a few minutes to flash off before applying the next, gradually building up your coverage.
Layering and Troubleshooting for a Perfect Finish
With a perfectly cured coat of Tamiya paint primer on your polycarbonate body, you've built the ideal foundation. Now it's time to bring your livery to life with Tamiya PS paints, a process that demands both patience and precision.
Building up vibrant, durable colours isn't about laying down heavy coats. It’s all about layering thin, consistent mists of paint.
Apply your PS colours using the same airbrushing principles you used for the primer. Keep that 4-6 inch distance and use smooth, overlapping passes. This method is the secret to preventing paint from bleeding under your masking tape, giving you those crisp, razor-sharp lines that define a competition-level paint job.
Fixing Common Paint Problems
Even with careful prep, things can go wrong. The key is knowing how to spot and fix issues without having to strip the whole body and start over. The success of any paint job, including our RC bodies, comes down to thorough groundwork, much like how professionals prep wood for painting. Here are the usual suspects and how to deal with them.
-
Orange Peel: This bumpy, textured surface looks exactly like its name suggests. It's almost always caused by paint that's too thick, air pressure that's too high, or spraying from too far away. When you spray from too far, the paint starts to dry mid-air before it even hits the surface. The fix? Thin your paint a little more or dial back your PSI to around 20.
-
Fish Eyes: These are nasty little craters where the paint pulls away from a spot on the surface. This is a classic sign of contamination—usually oils from your fingerprints or some leftover mould release agent you missed. If you see them forming, you have to stop. Let the paint cure, then give the body a thorough wipe-down with isopropyl alcohol before you spray again.
-
Poor Adhesion: If your paint flakes or peels off easily, the problem is in your prep work. Plain and simple. Either the surface wasn't scuffed enough for the primer to get a good bite, or it wasn't perfectly clean. There's no quick fix for this one, unfortunately. You’ll have to strip the body and start the preparation process from scratch.
Your primer coat is your single best defence against most paint issues. A smooth, well-bonded layer of Tamiya primer provides a consistent surface that allows your colour coats to flow out evenly and adhere properly, minimizing the chances of orange peel or adhesion failures.
Navigating the Post-Ban Reality
The Tamiya paint primer import ban that hit Canada on September 24th, 2024, was a game-changer. It created a 100% supply cutoff for PS primer sprays, forcing racers and hobbyists to rethink how they prepped their bodies.
This ban, which targeted high VOCs from Dimethyl Ether, affected a huge portion of the community—primers were a staple for over 90% of Canadian hobbyists. For competitive racers here at digital-rc, it forced an adaptation that actually led to some measurable gains. Switching to compliant bottled Tamiya primers often cut drying times from 30 minutes down to just 10. That's a huge advantage when you're trying to get a body painted on race day.
This shift proves that adapting your technique can lead to a faster and more efficient workflow, even when regulations change the tools we can use.
Your Essential Toolkit for Modern RC Painting
Things have changed in the world of RC painting. With aerosol cans of Tamiya paint primer no longer on the market here in Canada, getting a pro-level finish now means shifting your approach. The good news? The new method gives you far more control. It's all about assembling the right toolkit for airbrushing.
The heart of this setup is a dependable airbrush and compressor. You don’t need to break the bank on a high-end model to get started. A solid dual-action, gravity-feed airbrush is more than capable of laying down perfectly smooth coats of primer.
When you pair that with a small tank compressor, you get the consistent, steady airflow you need for a flawless application. We've found that shooting at around 20-25 PSI gives the best results.
The Right Consumables and Safety Gear
Beyond the hardware, you'll want to stock your workbench with a few key items. Having these ready to go makes the whole process smoother, from prep to final coat. This is the stuff we use ourselves—it’s all track-tested and available right from our shop.
Here's what you need on hand:
- Primer and Thinner: The star of the show is Tamiya Liquid Surface Primer. You absolutely must pair it with Tamiya Lacquer Thinner (the one with the yellow cap) to get it to the perfect consistency for spraying.
- High-Quality Masking Tapes: If you're planning any kind of livery with sharp, clean lines, don't cheap out on masking tape. Having a few different widths makes complex jobs much, much easier.
- Fine-Grit Sandpaper or Scuff Pads: Surface prep is everything. A light scuff with a fine abrasive gives the primer something to really bite into, which is critical for durability.
- Body Prep Tools: The basics still matter. Clean, precise cuts make all the difference. For a look at how pro-level tools can step up your game, check out our guide on using the MR33 Fluorine-Coated Scissors, the ultimate tool for RC body prep.
A quick but serious note on safety. Even though these bottled primers have lower VOCs than the old aerosols, you're still atomizing chemicals. Always wear a properly fitted respirator designed for paint fumes. It's non-negotiable.
Getting this toolkit together ensures you have everything you need for a finish that looks incredible and holds up to the abuse of the track. You're not just adapting to new rules—you're genuinely upgrading your entire painting game.
Common Questions About Priming RC Bodies
With the recent changes in the Canadian RC scene, a lot of questions have popped up, even from seasoned racers. Moving from the familiar Tamiya spray cans to an airbrush workflow is a big shift, so let's clear up the most common questions we've been hearing.
Can I Still Use My Old Tamiya Spray Primers?
Yes, you can still legally buy and use any Tamiya PS or TS spray primers you find on a retailer's shelf here in Canada. The government's new rules targeted the import of high-VOC aerosols, not the sale of existing stock that's already in the country.
Just keep in mind, that stock is dwindling fast and it won't be replenished. For any serious painter looking for consistent, reliable results long-term, making the switch to a quality alternative like Tamiya's bottled Liquid Surface Primer is the only practical way forward.
Is an Airbrush a Necessary Investment Now?
If you're a competitive racer who wants a flawless, durable finish, then yes—an airbrush has become a highly recommended tool. It gives you far more control over your paint job, saves you money on paint in the long run, and opens the door to using the best-performing, compliant primers on the market.
While you might find other aerosol primers out there, the precision and quality you get from an airbrush is what separates a good paint job from a great one. It's the new professional standard for high-level RC body painting in Canada.
What's the Best Tamiya Primer Alternative for Lexan?
The best and most direct replacement is Tamiya's own Liquid Surface Primer, applied with an airbrush. It's designed to work perfectly with the entire Tamiya paint system, giving you incredible adhesion on a properly prepped polycarbonate (Lexan) body.
When you thin it correctly with Tamiya Lacquer Thinner, it lays down an exceptionally smooth, tough base for your Tamiya PS paints. This is how you ensure your custom livery won't chip or flake off, even under the abuse of on-road racing.
Find the complete, modern toolkit for your RC painting needs at digital-rc. We stock the primers, thinners, and tools you need to adapt and excel. Shop Now.