

A Builder's Guide to Remote Control Car Kits to Build
Picking the right remote control car kits to build is the single most important decision you'll make as a competitive racer. This isn't just about grabbing a cool-looking box off the shelf. It's a strategic choice that aligns the car's scale, chassis, and drivetrain with your track, your driving style, and your racing ambitions. Get this right, and you're building a competitive edge before you even touch a wrench.
Choosing the Right RC Car Kit for Your Goals
Diving into competitive on-road racing starts long before you turn that first screw. The kit you choose lays the foundation for your entire season, dictating everything from how the car feels on the track to your maintenance routine and even which classes you can enter. It's all about matching the machine to the mission.
The hobby is absolutely booming, especially here in North America, which accounts for 34.6% to 36% of the global RC car market. With the market projected to explode from around USD 300 million in 2024 to over USD 1 billion by the early 2030s, the passion for high-performance kits is stronger than ever.
The Great Debate: 1/10 vs. 1/12 Scale
Your first big decision comes down to two numbers: 1/10 or 1/12. Nine times out of ten, your local racetrack and the classes they run will make this choice for you.
-
1/10 Scale Touring Cars: Think of these as the versatile workhorses of on-road RC. They’re right at home on larger, flowing tracks, whether it’s indoor carpet or outdoor asphalt. Their bigger footprint and four-wheel-drive systems make them stable and a bit more forgiving—a huge plus for racers at any skill level.
-
1/12 Scale Pan Cars: These are pure, razor-sharp racing machines. They're built for one thing: dominating small, high-grip indoor carpet tracks. The direct-drive, rear-wheel-drive layout makes them brutally quick and hyper-responsive, but they demand a precise and disciplined driving style.
If you're unsure, this chart breaks it down based on your primary track environment.
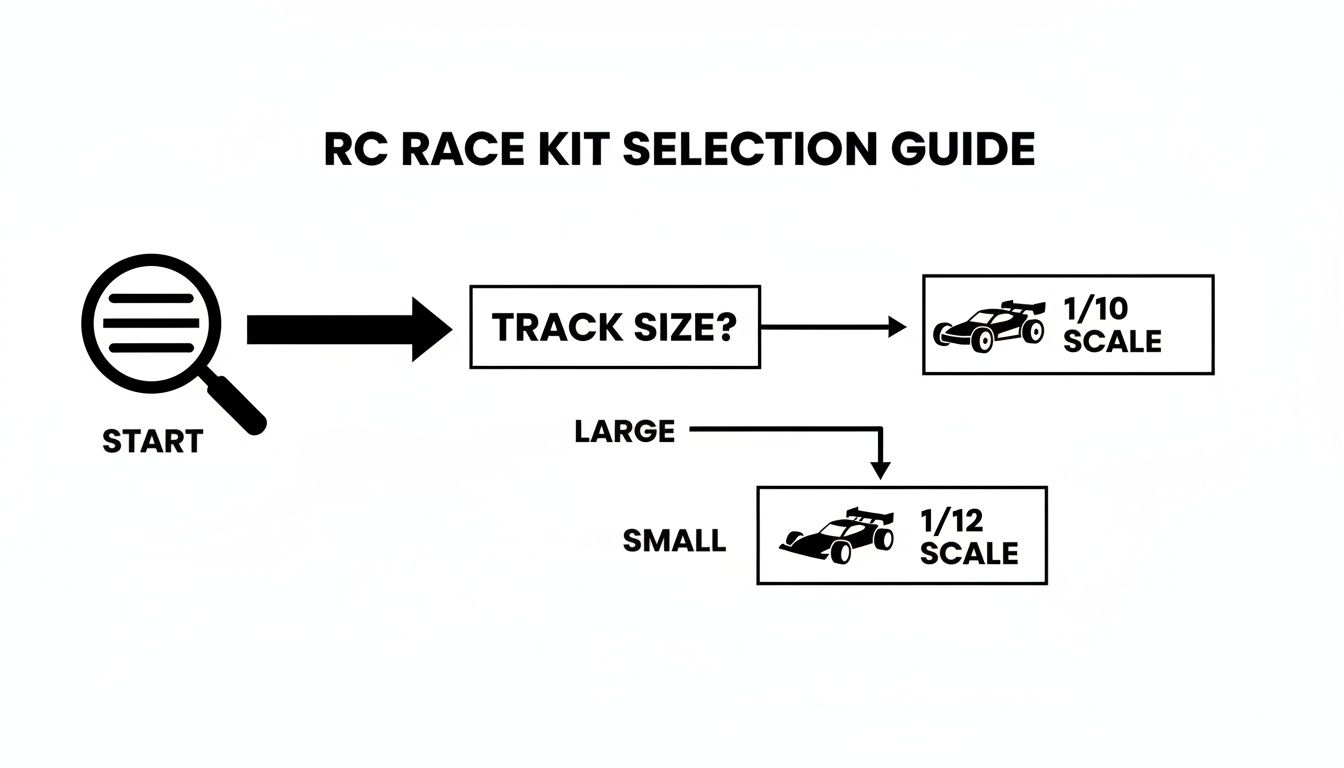
As you can see, the track itself is your best guide. Let its size and surface point you in the right direction.
To help you visualize the key differences, here's a side-by-side comparison of what to expect from each platform.
Comparing 1/10 vs 1/12 Scale On-Road Racing Kits
| Feature | 1/10 Scale Kits | 1/12 Scale Kits |
|---|---|---|
| Primary Track Type | Large indoor/outdoor tracks (carpet & asphalt) | Small, high-grip indoor carpet tracks |
| Drivetrain | 4WD (Belt or Shaft) | RWD (Direct Drive) |
| Handling | Stable, forgiving, good for all skill levels | Aggressive, precise, requires more driver skill |
| Speed | Very fast, especially in modified classes | Extremely quick acceleration and corner speed |
| Setup Window | Broader, more forgiving of minor setup changes | Narrower, very sensitive to setup adjustments |
| Maintenance | More complex due to 4WD components | Simpler, with fewer moving parts |
| Popularity | Extremely popular, often the largest classes | A core, dedicated class in competitive racing |
Ultimately, both scales offer incredible performance and tight competition. Your choice depends entirely on where you plan to race and what kind of driving experience you're after.
Chassis Materials and Drivetrain Philosophy
Once you've landed on a scale, it’s time to look at the chassis material and drivetrain. These elements truly define a car’s personality on the track.
A kit’s chassis is its backbone. Top-tier kits from brands we carry like XRAY and Yokomo offer carbon fibre or aluminum options. A carbon fibre chassis has more inherent flex, which can help generate mechanical grip on lower-traction surfaces. An aluminum chassis, by contrast, is much stiffer, giving you more precision and consistency on high-bite tracks where flex is less desirable.
The drivetrain is the heart of the car, and your choice here matters.
For a competitive builder, the drivetrain isn't just a set of gears; it's a tuning tool. The choice between a belt or shaft system fundamentally changes how the car delivers power and reacts to your inputs on the track.
A belt-drive system delivers power smoothly and progressively. It's often the go-to for high-grip carpet racing where you want to avoid unsettling the car. A shaft-drive system, on the other hand, gives you instant, direct power. It’s tough and often preferred for the brutal demands of modified racing or lower-grip asphalt where you need that immediate punch.
While our focus here is on purebred racing, the principles of chassis and drivetrain dynamics apply across the board. If you're exploring other high-performance scenes, you can see how these concepts apply to our 1/10 scale drift RC cars as well.
Choosing the right kit from our curated collection is the first step toward building a car that perfectly matches your skill, budget, and competitive goals.
Setting Up Your Workspace for a Flawless Build
A championship-winning car isn't just built; it's crafted. And that craft starts with a well-prepped workspace. Before you even think about tearing open the first parts bag, take some time to get your build area in order. A clean, well-lit bench is the unsung hero of every successful kit build—it'll save you from lost parts and a ton of frustration down the line.
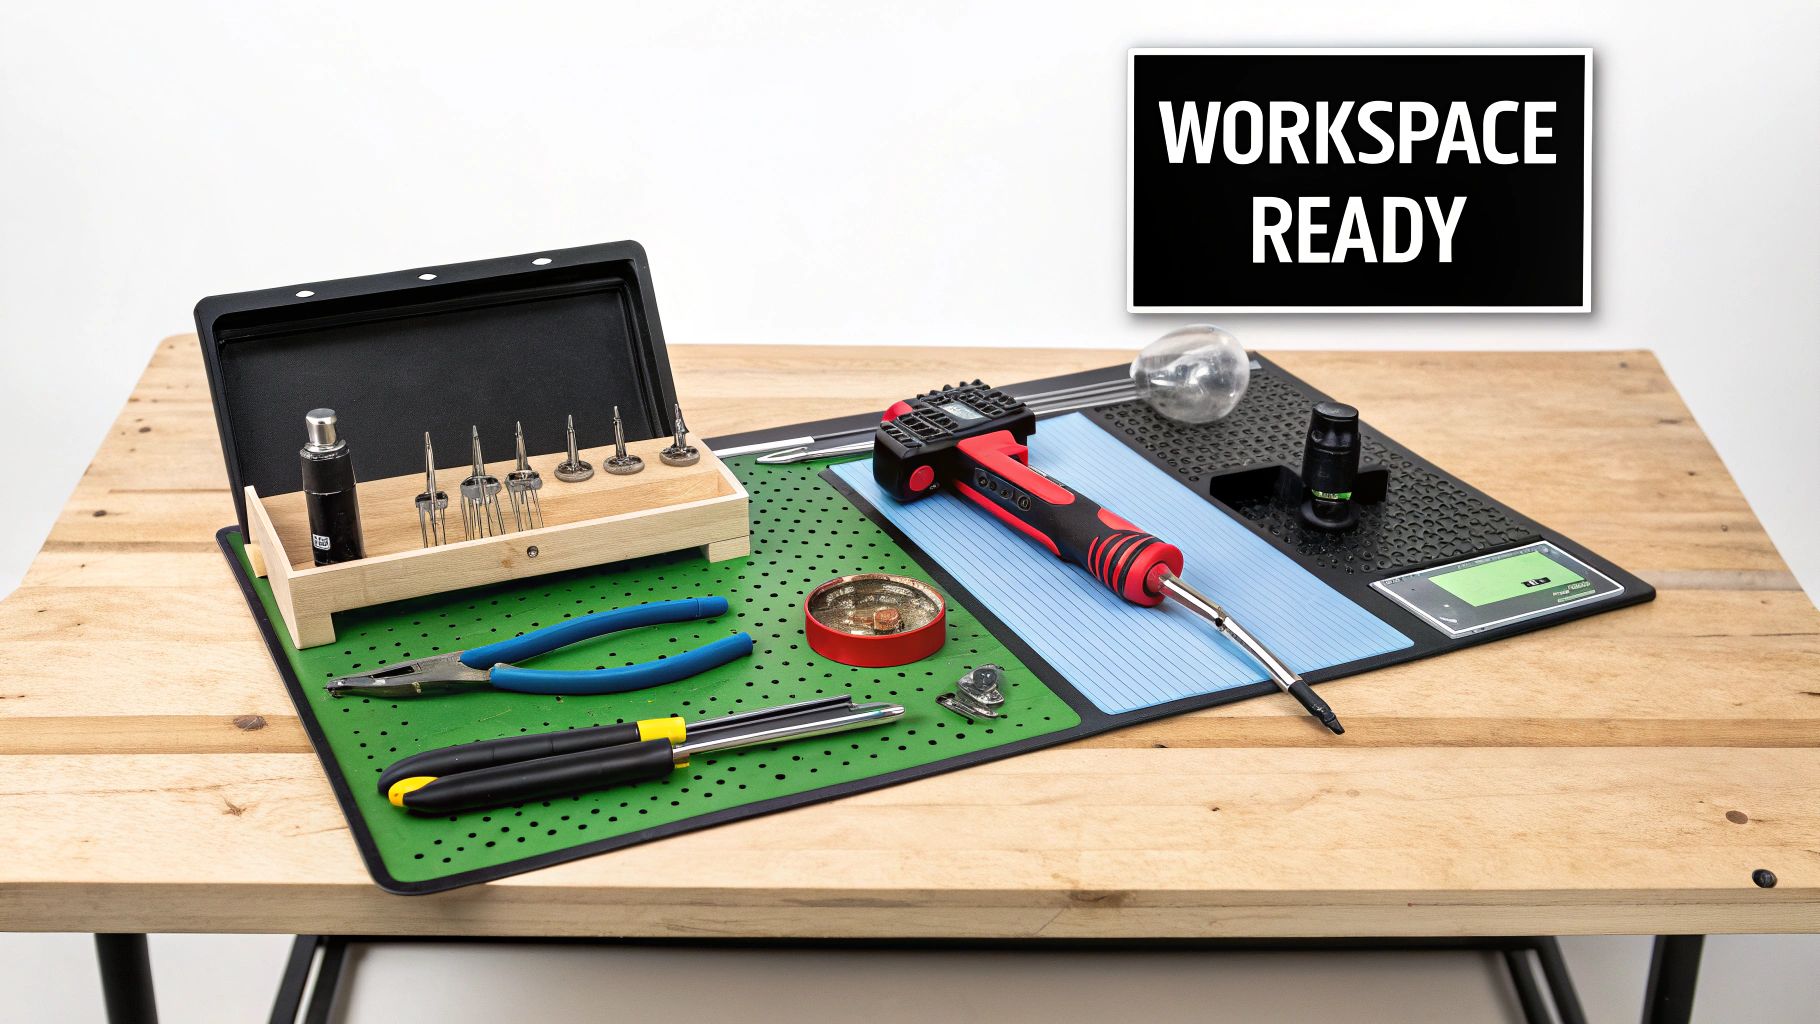
Think of it this way: when everything you need is right where it should be, you can focus 100% on the quality of your assembly. That’s how you get every step perfect.
Assembling Your Essential Tool Kit
The kit has all the car parts, but the tools you use to put them together are just as critical. Trust me, investing in quality tools from the get-go makes the build more enjoyable and, more importantly, prevents stripped screws and damaged parts.
Here’s a no-nonsense checklist of tools every serious builder needs on their bench:
- High-Quality Hex Drivers: Forget the little L-shaped wrenches that come in some kits. A good set of precision hex drivers (usually 1.5mm, 2.0mm, and 2.5mm) with proper handles is non-negotiable. They're the difference between a smooth build and a nightmare of stripped screw heads.
- Precision Nut Drivers: Absolutely essential for wheel nuts and other hardware. A proper set gives you way better feel and leverage than a multi-wrench. If you want to know what the pros use, check out our guide on professional nut drivers for RC racing.
- Shock Pliers: This multi-tool is a lifesaver. It’s designed to grip shock shafts without scratching the finish and helps pop ball ends into place with ease.
- Hobby Knife: Perfect for cleaning up plastic parts trees and trimming polycarbonate bodies. Pro tip: always use a fresh, sharp blade for the cleanest cuts.
- Needle-Nose Pliers and Side Cutters: You'll be reaching for these constantly for holding tiny parts, snipping wires, and a hundred other little tasks.
Beyond the basics, a couple of simple accessories make a huge difference. A good pit mat stops tiny screws from bouncing into another dimension, and a magnetic parts tray is the best way to keep your fasteners organized for each step. Don't forget about lighting, either; working on tiny components is much easier with optimal lighting conditions.
Selecting Your Race-Winning Electronics Package
Alright, workspace is sorted. Now for the fun part: choosing the electronic heart of your new car. The right electronics package, which you can find right here in our shop, will define your car's speed, feel, and reliability on the track. This is where you really start tailoring the performance to your class and driving style.
Your core electronics package comes down to five key items:
- Motor: For racing, a sensored brushless motor from brands like Hobbywing or Maclan is the standard. The motor's "turn" rating (like 17.5T for "spec" classes or 5.5T for "modified") will be determined by your local track's rules.
- Electronic Speed Control (ESC): This is the brain that tells the motor what to do. It needs to be rated to handle the power of your motor. Modern racing ESCs from our collection are incredibly tuneable, usually with a programming box.
- Steering Servo: Speed and torque are what matter here. A fast, high-torque servo from a brand like ProTek RC gives you that instant, crisp steering response you need to hit your lines perfectly.
- Receiver and Transmitter: Your radio gear is your direct connection to the car. A quality Futaba or Sanwa system provides a solid, glitch-free signal and lets you make crucial adjustments like endpoint and expo right from the transmitter.
- Battery: For 1/10 and 1/12 on-road, Lithium Polymer (LiPo) batteries are the only way to go. Make sure you get the right voltage (2S for 1/10 scale, 1S for 1/12 scale) and a capacity that balances runtime with weight.
Choosing electronics isn't just about grabbing the most powerful stuff off the shelf. It’s about building a compatible system that meets the rules and works together to give you smooth, consistent, and controllable power lap after lap.
When you carefully select each component from our race-proven electronics, you know everything will work together flawlessly. You’re not just building a kit; you’re building a competitive machine. Now, let's get started.
Building Your Rolling Chassis with Precision
This is where the magic happens. You've got your parts laid out, your tools are ready, and a box of beautifully machined components is about to become a rolling chassis. Forget about speed for a moment. This part of the build is all about patience and getting the details right. The care you put in now pays off massively in performance and durability on the track.
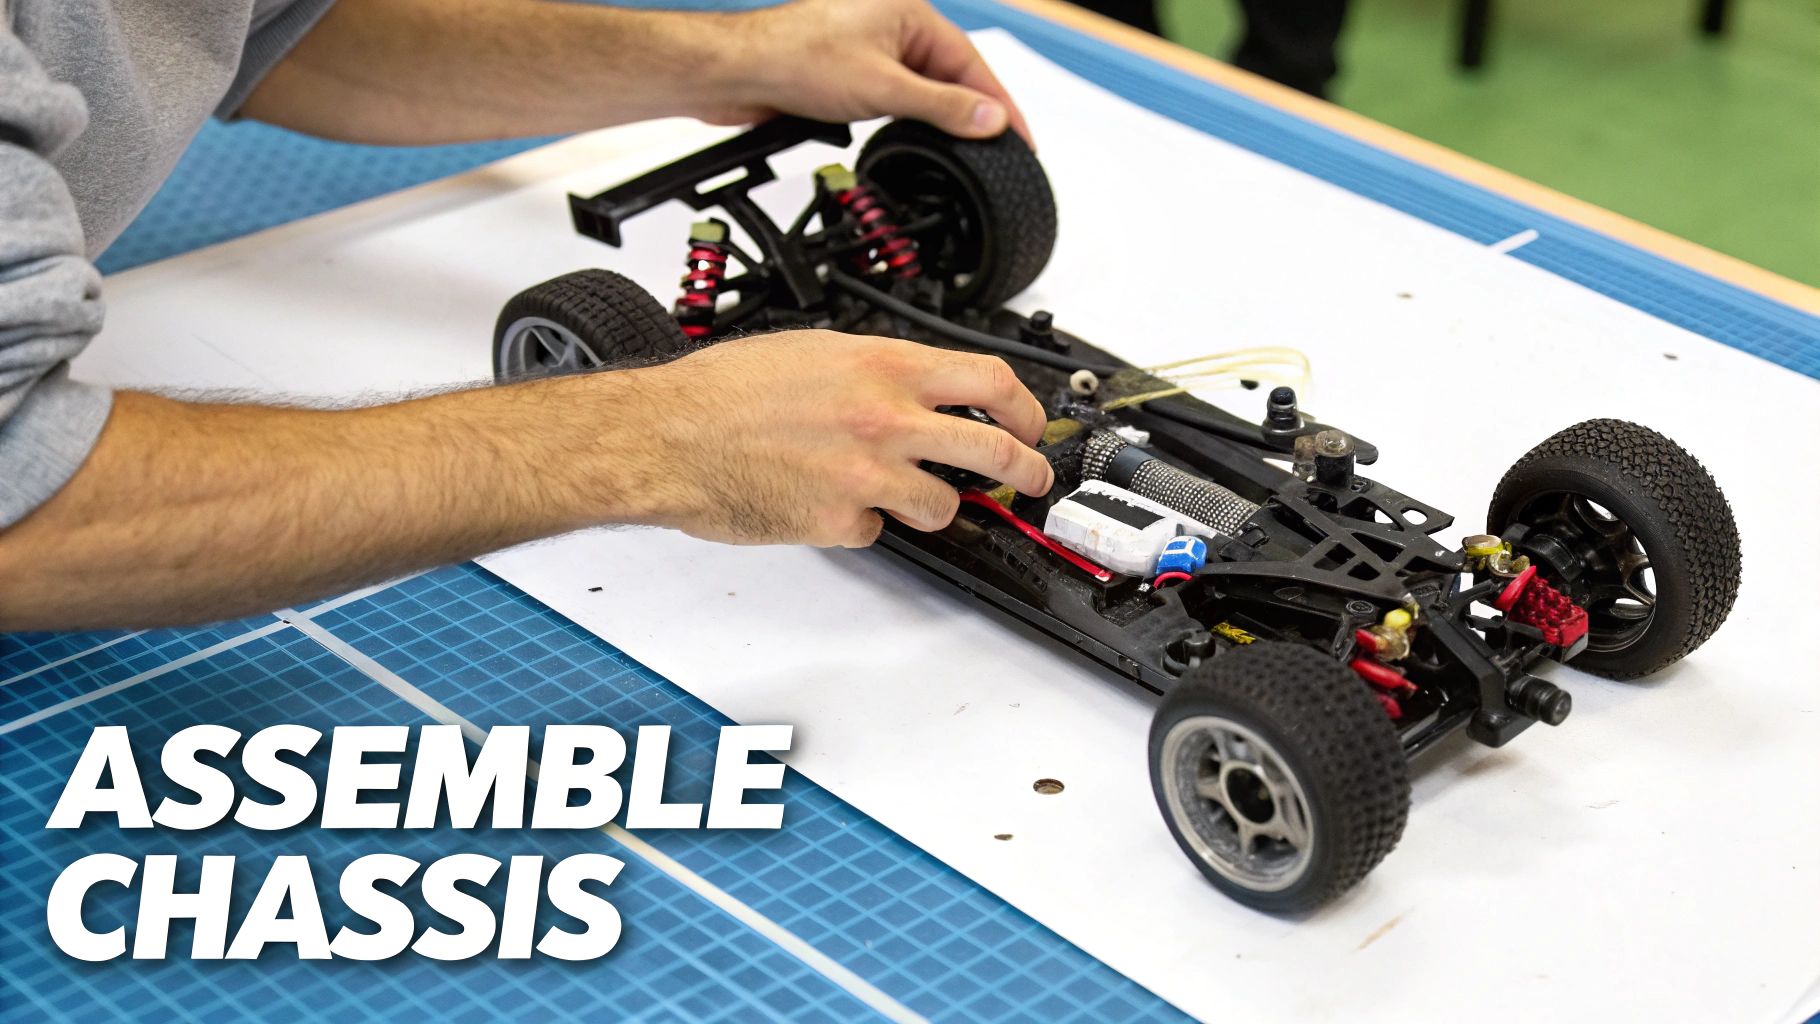
We're going to go beyond the manual here, focusing on the pro techniques that make a build truly great. These are the little things that prevent common headaches and create a flawless foundation for all the electronics you'll be adding later.
Preparing and Sealing Carbon Fibre Components
Nearly all high-end remote control car kits to build use carbon fibre for the chassis and other critical parts. Before you even bolt anything on, the first job is to seal the edges. Right out of the box, these edges can be sharp and prone to splitting or delaminating after a hard knock into the boards.
A thin coat of CA (cyanoacrylate) glue along all the exposed edges is the solution.
- Grab a cotton swab or a proper applicator tip to run a clean, thin bead.
- Pay close attention to the main chassis plate, the shock towers, and any other carbon bits.
- Let it dry completely before you do anything else. This simple step adds a ton of strength and can save you from having to buy a new chassis mid-season.
Once the glue has cured, a quick pass with fine-grit sandpaper will give the edges a smooth, professional feel. It looks clean and stops anything from snagging on the racing surface.
Building Silky-Smooth Differentials
Your car's cornering ability lives or dies with the differentials. A badly built diff feels gritty, inconsistent, or worse, it leaks all over your chassis. The goal is buttery-smooth action with absolutely no binding.
Take your time when assembling your gear or ball diffs. Make sure every internal gear is free of flashing and that they all mesh perfectly. A classic rookie mistake with gear diffs is overfilling them with fluid, which causes pressure to build up and leads to leaks. As a rule of thumb, just fill it enough to cover the small internal spider gears.
The viscosity of your diff fluid is one of your most powerful tuning tools. Here are some solid starting points:
| Differential | Common Fluid Weight (cSt) | On-Track Effect |
|---|---|---|
| Front | 500,000 - 2,000,000+ | Thicker fluid helps pull the car through corners on-power but can reduce off-power steering. |
| Rear | 5,000 - 10,000 | Thinner fluid lets the rear end rotate more, which is great for tight, technical tracks. |
This drive for highly tuneable parts is everywhere in the hobby now. It's no surprise that electric models, which are perfect for kit builds, dominate with about 60% of the market share. You can get more insights on industry trends and how the hobby is evolving over on MarketReportAnalytics.com.
Perfecting Your Shock Assembly
Building a perfect set of shocks—with zero trapped air—is a skill that directly translates to predictable handling. Air bubbles create spongy, inconsistent damping, making the car feel nervous over bumps and unstable in the corners.
After filling the shock body with oil, slowly work the piston up and down to work any air bubbles free. Then, just let the shocks sit for a few minutes. You'll see tiny bubbles rise to the surface. Patience is key here.
A perfectly built set of shocks is the foundation of a good setup. They should feel identical, with smooth compression and rebound. Any inconsistency between them will lead to an imbalanced and unpredictable car.
Once the air is out, "bleed" the shock by slowly screwing the cap on. A little bit of oil should escape through the bleed screw or hole, which tells you there's no excess pressure or trapped air inside. When you're done, each shock should feel exactly the same when you compress it.
The Logical Build Progression
With your diffs and shocks sorted, it's time to bring everything together on the chassis. The instruction manual gives you the sequence, but understanding why you're doing it in that order is what matters.
- Chassis Foundation: Start by attaching the bulkheads, motor mount, and suspension mounts to the main chassis plate. Check and double-check that every screw is snug and all the parts sit perfectly flat with no tweaks or gaps.
- Drivetrain Installation: Now, drop in the differentials and the centre layshaft or belts. This is a crucial checkpoint. Before the top deck goes on, spin the drivetrain by hand. It should feel incredibly free, with almost zero resistance. Any binding you feel here is just lost power and shorter run times.
- Suspension Assembly: Finally, build and attach the suspension arms, hubs, and turnbuckles. Make sure every part can move through its entire range of travel without binding or hitting anything. This is when you'll set your initial camber and toe links to the kit's recommended lengths—that's your baseline setup.
By focusing on these key areas—sealing carbon, building perfect diffs and shocks, and ensuring a free-spinning drivetrain—you’re not just following instructions. You're building a reliable and consistent platform that's ready to hit the track.
Installing the Electronics and Finishing Your Car
You’ve got a rolling chassis—the skeleton of a high-performance machine. Now it's time to bring it to life by installing the nervous system and heart: the electronics. This is also where you give the car its identity with a finished body and race-ready tires. This is the stage where a mechanical marvel transforms into a track weapon.
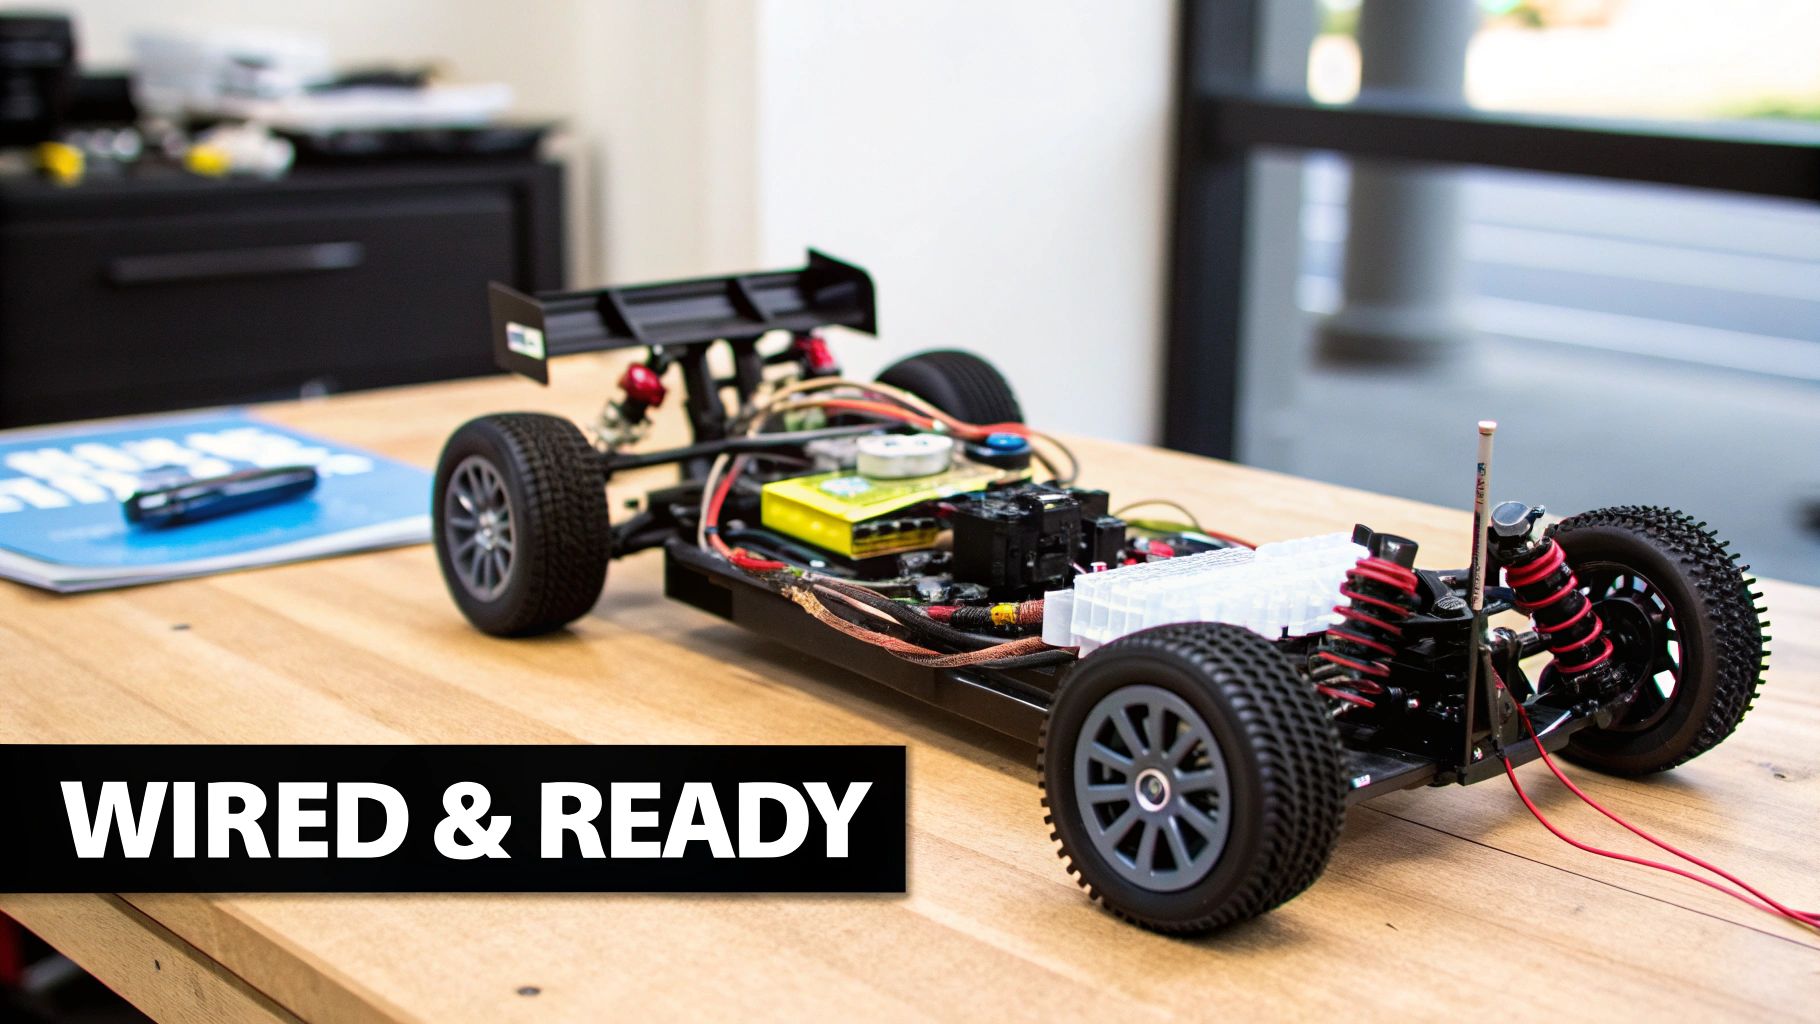
Attention to detail here is everything. It's the difference between a car that's reliable and one that's a liability. A clean wiring job doesn't just look professional; it prevents failures and makes those frantic trackside repairs a whole lot easier.
Wiring for Performance and Reliability
First up is soldering your motor and Electronic Speed Control (ESC). These connections handle a massive amount of current, and a sloppy joint will rob you of power or, worse, fail completely mid-race. Use a quality soldering iron with a clean, tinned tip and don't skimp on the solder.
The goal is a strong, shiny joint that flows smoothly onto the terminals. Keep your wires as short as you can without creating tension. This cuts down on electrical resistance and weight while preventing loose wires from getting chewed up by the drivetrain. You can learn more about this critical component in our guide on the RC Electronic Speed Control.
Component Placement and Wire Management
Where you mount each electronic component directly affects your car's balance and handling. This isn't something to rush; thoughtful placement is a huge part of building competitive remote control car kits to build.
- ESC and Receiver: Get these mounted as low and centrally as possible. Good double-sided servo tape is your best friend here—it provides a secure hold and dampens some vibration.
- Steering Servo: Make sure it's mounted squarely. The servo horn needs to be perfectly centred when your radio is on and the trim is neutral. This is key for getting equal steering throw left and right.
- Transponder: Mount this vertically where the track's timing loop can easily see it. If you're not sure, ask a regular at your local track for the preferred location.
Once the components are in place, focus on routing the wires cleanly. Use small zip ties or braided sleeving to bundle them neatly and, most importantly, keep them away from anything that moves—belts, driveshafts, or the steering assembly. A clean layout is a reliable layout. As you work with these sensitive parts, it's also smart to brush up on expert tips on how to store electronics for maximum device protection for any spares, ensuring they're ready when you need them.
Painting and Finishing the Body
The polycarbonate body is your car's calling card on the track. A great paint job isn't just for looks; it helps you see your car in a pack. Always start by washing the inside of the body with soap and water to remove any mould-release agents left from manufacturing.
Use masking tape designed for polycarbonate to lay out your design. When you spray, apply thin, even coats, and always start with your darkest colours first. For example, if your scheme is black and white, spray the black, let it fully dry, then back it with white.
A well-finished body is more than just aesthetics; it's the final piece of the aerodynamic package. Taking the time to properly trim the wheel wells and mount the wing correctly ensures the car performs as the designers intended.
After painting, carefully trim the body along the cut lines using curved body scissors and a sharp hobby knife. Test-fit it on the chassis, checking that it doesn't rub the tires at full suspension compression or steering lock.
Prepping Your Wheels and Tires
This is it—the final assembly step. Your tires are the car's only connection to the track, so don't cut corners here. Start by cleaning the tire bead and the mounting surface of the wheel with rubbing alcohol or a specific tire cleaner to remove any oils. This is crucial for a strong glue bond.
Mount the tires onto the wheels, making sure they are seated evenly all the way around. Apply a thin bead of CA tire glue into the channel where the tire bead meets the wheel. I like to work in small sections, letting the glue wick into the gap before moving on. Do this for both the inner and outer beads.
Once the glue has cured, the final touch for serious racers is balancing. Using a dedicated tire balancer, you can find and correct heavy spots with tiny pieces of balancing putty. A balanced tire assembly rotates smoothly at high RPMs, which eliminates vibrations that can upset the car's handling and cause premature wear on bearings.
Your car is now complete and ready for its first shakedown.
Your First Shakedown and Basic Trackside Tuning
A perfectly built car is a great starting point, but races aren't won on the workbench. The real magic happens at the track when you start the tuning process—transforming that great kit into a true extension of your driving style.
This initial "shakedown" is all about getting a feel for your new machine and establishing a baseline. Forget setting speed records for your first few laps. Instead, just listen and feel. Does the car pull to one side? Is it stable down the straightaway? Does it feel predictable in the corners? The goal here is to spot any obvious issues and just make sure everything is working as it should before you start chasing tenths of a second.
This is where the real hobby begins, separating the casual bashers from dedicated racers. It's why industry reports show over 40% of RC cars are bought by serious hobbyists, not just as toys. That dedication is what drives the market, with recent North American sales valued between USD 92.9–102.5 million, fuelled by enthusiasts who invest in tuning parts for their remote control car kits to build. You can dig into more of these market trends in this comprehensive business research report.
Setting Your Baseline Geometry
Before you even think about serious tuning, you need to lock in a solid, repeatable baseline. This means grabbing a proper setup station and gauges to dial in three critical geometric angles. Don't eyeball this stuff—precision is your best friend on the track.
-
Ride Height: This is simply the distance from the bottom of your chassis to the ground. It’s your main tool for managing weight transfer. A lower ride height usually adds grip on smooth, high-bite surfaces, while a higher setting can help the car float over bumps and find grip on looser tracks.
-
Camber: Look at the car from the front or rear—camber is the angle of your tires relative to the track surface. Negative camber, where the top of the tire tilts inward, maximizes the contact patch of the outside tire during cornering for more grip. Most baseline setups start somewhere between -1.5° to -2.0°.
-
Toe: This is the direction your tires point relative to the chassis centreline. "Toe-in" (fronts of the tires pointing inward) adds stability, especially at the rear. "Toe-out" at the front can sharpen up your turn-in, but be careful, as too much can make the car feel twitchy.
Your setup sheet is the most valuable tool in your pit box. Write down every single change, no matter how small. This is the only way to really understand what works and, more importantly, how to get back to a good starting point when you've tuned yourself into a corner.
First Adjustments: Shocks and Diffs
With your basic geometry set, you can start playing with the car's dynamic behaviour. Your shocks and differentials have the biggest impact on how the car handles bumps, transfers weight, and puts power to the ground.
The key here is to make small, methodical changes. Adjust only one thing at a time, run a few laps to feel the difference, and write down what happened. This stops you from getting lost in your setup and helps you build a deep, intuitive understanding of cause and effect.
Here’s a quick-reference guide to how some of the most common setup changes will affect your car's performance on the track.
How Basic Tuning Adjustments Affect Handling
| Tuning Adjustment | Effect on Handling | When to Use It |
|---|---|---|
| Softer Shock Springs | Increases mechanical grip and makes the car smoother over bumps. | On low-grip or bumpy tracks to help the car generate traction. |
| Harder Shock Springs | Makes the car more responsive and aggressive, improving handling on smooth, high-grip surfaces. | When the car feels lazy or is rolling too much in high-speed corners. |
| Thicker Shock Oil | Slows down suspension movement, making the car feel more stable but less responsive to bumps. | On high-grip, smooth tracks to calm the car's reactions. |
| Thinner Shock Oil | Allows the suspension to react faster, improving performance on bumpy or uneven surfaces. | When the car feels like it's "packing up" and skipping over bumps. |
| Thicker Rear Diff Fluid | Reduces on-power steering and makes the rear end feel more locked-in during acceleration. | To improve forward drive out of corners, especially on high-grip tracks. |
By working through these fundamental adjustments, you’ll start tailoring the car’s behaviour to your specific track and driving style. This back-and-forth process of testing, adjusting, and documenting is the very heart of competitive RC racing—and it's easily the most rewarding part of building your own kit.
Got Questions About Your Build? We've Got Answers
Stepping into the world of competitive RC kit building always brings up a few questions. It's totally normal. To help you get your car on the track faster, we've put together some straight-up answers to the questions we hear most often from racers building high-performance kits.
What's the Single Biggest Mistake New Builders Make?
Hands down, it's rushing the build. It's so tempting to blaze through the steps to see the finished car, but the instruction manual is your best friend for a reason. Slowing down now prevents major headaches later.
Two classic mistakes trip people up all the time. First, forgetting to apply thread-lock on every single metal-to-metal screw. Vibrations will work those screws loose, and you'll be chasing problems you can't see. Second is cranking down too hard on screws going into plastic parts. This strips the threads or, even worse, warps critical components, throwing your setup completely out of whack.
Take your time. A careful, patient build results in a car that's durable, reliable, and consistent on the track.
How Do I Pick the Right Electronics for My Kit?
Your electronics package starts with one thing: the rules. Before you buy anything, check the regulations for the racing class you plan to run. That will tell you if there are any motor or battery restrictions you need to follow.
Once you know the rules, here’s what you need for a competitive on-road setup:
- Motor/ESC: A sensored brushless motor and ESC combo is the standard for a reason. Your motor 'turn' (like a 17.5T for a spec class) has to match what your class allows. All the top-tier combos we carry are designed specifically for this kind of racing.
- Servo: Don't skimp here. A high-speed, high-torque steering servo is what gives you that immediate, precise control you need to hit your lines perfectly.
- Radio System: Make sure your radio transmitter and receiver are a matched pair that provides a solid, glitch-free signal. Nothing's worse than losing control of your car mid-race.
- Battery: Grab a LiPo battery that not only fits your chassis but also meets the voltage and capacity requirements for the length of your races.
A winning electronics package is a complete system where every part works together. It’s not about having the single fastest motor. It's about creating a balanced, reliable, and smooth power delivery that lets you lay down consistent lap times.
What Are the First Upgrades I Should Actually Buy?
Modern race kits are incredibly capable right out of the box. Honestly, your first investment shouldn't be on flashy "upgrade" parts, but on essential tuning options.
Focus on the parts that let you adapt your car to different tracks and changing conditions. This means stocking up on different compounds of tires, a good range of shock springs and oils to adjust your suspension, and a few different sway bars to dial in the car's body roll. These are the items that give you the biggest performance gain for your dollar.
Save the fancy stuff like ceramic bearings or a lightweight chassis for later, after you've gotten some real track time and know exactly what you want the car to do.
Ready to start your championship build? At digital-rc, we stock the race-proven kits, electronics, and tools you need to build a winning machine. Explore our curated collections for 1/10 and 1/12 scale racing and get everything you need with fast, same-day delivery. Find your next kit at https://digitalrc.ca